Thursday, August 29, 2019

Murano, Murrini, Millefiori and Other Glass Confusion

Fish with murrini eyes and decorative murrini accents
Today, when I was getting ready for a bit of torch fun, I threw out this sentence~ 'I'm just going to make a few murrini.' The response? 'I thought you had to go to Italy to do that.' Hmmm, and this from someone who has slogged through many years of listening to me talk about glass, glass and more glass. I'm sure a lot of folks are confused by glass terms because, well, a lot of them sound similar. And what's with all the Italian words?! So I'm here to, hopefully, make a little of it make sense.

Follow this link to find out more about the language of lampwork.


Murano~ Many of you are familiar with 'Murano Glass'. Murano glass is simply glass that is made by traditional methods on the island of Murano in Italy. But... The supplies for most of the beads I make are made on that same island. Some companies will call their glass Murano glass because the raw materials for the items are made in Murano. There are actually strict rules about what should labeled Murano glass ~ find more information about that here.

Making the cane
Heating the glass to stretch it
The canes before being cut
Murrini~ A slice of composite cane which creates a pattern in cross section. Lino Tagliapietra gives a thorough explanation on his website. There are a number of different ways to make this cane, both over a torch and in the kiln. Glass is layered into a large barrel shape, which creates a pattern within. The cane is then heated and stretched into a thinner rod, which reveals a pattern in cross section when it is sliced after it has cooled. These slices or chips are then applied to hot glass in a number of different ways. They can be applied on the surface or encased with clear glass; melted flat to the larger glass piece or left as bumps on the glass. Nearly any pattern can be made using this technique, as shown by Loren Stump. Find more information here. My own murrini are pretty simple. I've still got a lot to learn in that department!


Millefiori~ Italian for 'thousand flowers', millefiori is a lot of murrini laid up right next to each other, often covering an entire glass piece or an area of a piece. I personally expect the murrini in a piece referred to as millefiori to be patterned in a way that looks like flowers. Otherwise, I would refer to the glass piece as having a 'mosaic' design., which is what these patterns were called prior to about 1849.

Moretti~ A type of soft glass commonly used in glass beadmaking which is made by the Effetre company on the island of Murano.

Here's a wee bit more about my own murrini use.


Thursday, August 15, 2019

Removing a stuck lampwork bead from a mandrel.


Removing a Stuck Bead From a Mandrel

Here's what I have found works particularly well for removing long, thin glass beads from a mandrel (a tip from my book 'Reflections, the Diary of a Glass Beadmaker'). Tubes can be more difficult to remove from your mandrel than other types of beads due to the larger amount of glass that is in contact with the mandrel.
 
Soak the beads in water for a little while. Grab mandrel right below the bead with vice grips (at the long end of the mandrel). Make sure the vicce grips are tight on the mandrel and perpendicular to it. Grab the bead firmly with a paper towel or flexible jar opener. Turn the whole apparatus so that the bead is at the bottom. Grip the bead firmly and (here's the trick!) wiggle the vice grips (not the bead) back and forth and turn them until the bead loosens. Once the bead has loosened, twist and pull it to remove completely. 
You can also try tapping the tip of the mandrel against a hard surface to set up a little vibration that may help loosen the bead release.

I have heard that soaking in vinegar may help, and also that putting a bead in the freezer might help because the metal mandrel contracts a little bit. For me, the vice grips method works best.

Tuesday, July 16, 2019

Lampwork Glass Fish Beads and Other Glass Sculpture to Wear!

See Spot
Well, I have little, if anything new to say about lampwork glass fish, except I make them. A lot of them! Sea life is always a fun theme. Most of my fish styles only exist in my lampwork world. They often come together as I work on them, though I have an idea about colors and design before I begin. As I go, I pay attention to how the design is developing and decide what seems to be working (or not!). There is a gallery that contains some previous designs on flickr, and always loads of fish pendants available in my etsy shop, of course!


Pink Adobe Turtle


I also make turtles, seahorses, a random sea urchin, some shells now and again and even mermaids when things lead me in that direction. Turtles are always interesting- folks ask for odd colors and then I want to check and see if there are any actual turtles in similar colors. What a surprise! There really are pink turtles. Not quite like these, but still... Oh, and frogs, but perhaps I should have a special post about those guys.


There is this cool book called 'Art Forms in Nature' published by Dover books that is simply filled with interesting designs to influence my glass work! any of those creatures are from the ocean realm. But sometimes I just have to pull them onto shore! Some these beads go distinctly into the fantasy realm, like these mannikin beads. I call them that because, well, they remind me of little sentries, or maybe chess men!

Wednesday, June 12, 2019

Medieval glass bead spindle special tips


The other day, I had the good fortune to meet someone who had been gifted a glass bead spindle from my etsy shop. She had some questions about things that I had never thought about, so here are a few extra special tips to help modern gals learn about going Medieval with their spindle skills. And do remember to see my other spindle blogs, and the missing spindle blog and 
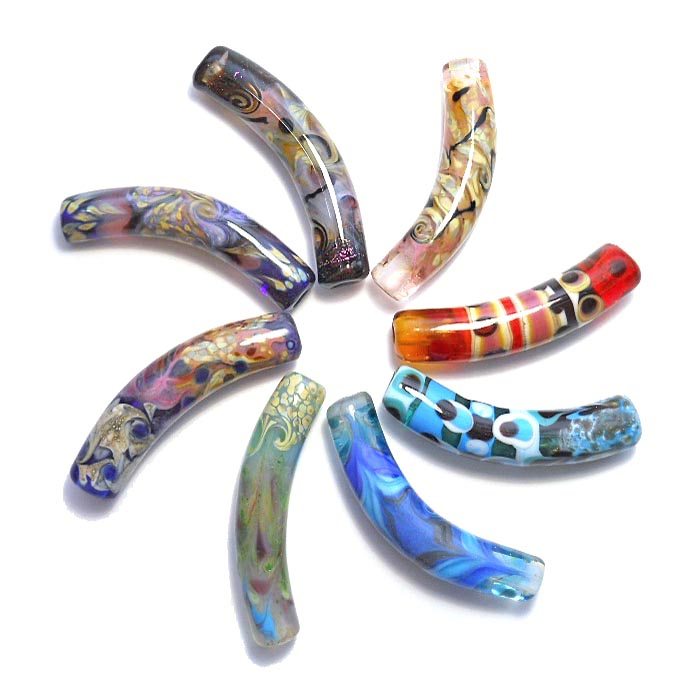
youtube channel about these for even more information! Each listing in my etsy shop tells about the weight, size and spin-ability of the whorls shown. That's a good place to start making an informed decision. These are all bottom weighted spindles meant to spin thin yarn. I have not tested them as top whorls.


First the oh-so-helpful o-rings and/or clear hair bands that will help keep your whorls from whirling away. Why do I recommend these and send them along with your order? Well, when I first began making these whorls and they were being tested by Lois, she came back and said something like~ 'these are really sturdy, they were rolling all over my concrete floor,' I looked at her and said- 'we've got to stop that!' A little thinking cap time revealed the o-ring solution. If the whorls go skidding across a hard floor too many times, they should not break, but they will get scuffed up. And it's annoying to have to go skittering after them all the time. You should be able to get more o-rings at your local hardware store in the section with all the little boxes of random hardware. I use the two smallest sizes available. The best place I've found for the clear hair bands (if you prefer those) is Sally Beauty Supply. 
(P.S.~ if your whorl does break, please tell me! They are guaranteed not to do that.)

Why are there two whorls? Well, for the weight! Use them both together when you begin, then as the cop grows you can remove the bottom whorl. As it grows even more, remove the top whorl and put the lower whorl back on. When your cop gets really heavy, you may even be able to take both whorls off and keep on spinning! The double whorl system came into being when my design partner (Lois of missingspindle fame) and I were trying to figure out a way to make the glass a bit more weighty. Since I am only able to make relatively round whorls up to a certain size & weight, we thought of adding a smaller whorl below. Et voila! The two whorl system was born. The smaller whorls can also be paired quite nicely to sit below a heavier pottery whorl~ this is mostly done for looks!

Which end of the stick is which? These sticks are tapered at each end and fatter in the center~ but one end is shorter beyond the wide bit than the other. The short end is for the whorls, while the long end is for spinning up your fiber. Please be sure there is no fiber under you whorl and that your cop is not so low that it is pushing on the whorl. It can push it right off the stick if it is.

What's with the tapered holes? My glass whorls are built on a special steel mandrel that is tapered; so the holes in the beads are not straight. Why? So they will fit on the spindle nicely; it also means there is a right and wrong way to place the whorls on the stick. To double check, put the whorl on and look up the stick to the base of the whorl. If there is a lot of 'wobble room', the whorl is likely on upside down. Flip it and check again. A small gap can often be remedied by pushing the o-ring up snugly under, or even partway into, the gap. A wobbly whorl will make for a wobbly spin. When you are checking whorl listings. be sure and read through the whole description~ if the whorls have a little wobble, I'll let you know. If they spin like the proverbial top, I'll tell you that too!

Do all whorls fit on all sticks the same way? Definitely not! Here's why. I make the whorls in my home studio, Caroline makes the sticks in Ohio, the mandrels for building the whorls were made by a glass tool maker in California. Everything is made by hand by the three of us. All my mandrels are not precisely the same size, with the same taper (I've got a couple of faves I normally use now, which helps). All of the sticks are not precisely the same size. This is one advantage to getting an entire set from me~ I have tested the whorls and paired them with the stick they fit and spin on the best! In some cases you may see that a set is only available all together. This is because the whorls have been particularly difficult to pair with a stick. In some cases I have tweaked the stick and sanded it to make sure everything works well. If you are considering buying a pair of whorls, check the photos to see how close together the two ride on the stick shown. This is a good gauge as to whether they will fit on just any old stick. If they are close together, the chances of them fitting on your stick are often a little smaller. You can also ask me if I feel they are tetchy or easy to pair up!

I hope this might answer some of the questions folks might have about all this. If you have questions, please let me know. You can visit my facebook fan page and send me a message, or message me through my etsy shop.


Tuesday, March 19, 2019

Making Blown Glass Beads with video link


People are so interested in learning to make hollow glass beads on the end of a hollow mandrel or small blow pipe- myself included! Thanks to a wonderful bead making buddy, I was shown a way to do it that is pretty cool, without the use of diamond shears. Many people can do this better than I can~ I am still learning, but this video will show the basics, along with ways to recover from some errors that I guarantee will happen to you too!

Here is my youtube video in all its glory!
https://youtu.be/hM6L3MVHkWs
 
A couple of video pointers~

*  Make your first wrap of glass nice and thin and right at the very end of the mandrel and it will pull off much better and have a good hole with less fooling around.

*  I start with a small coiled bead or cup bead, very similar to the way a hollow bead might be made on a mandrel. That way there is a little bubble built in from the start.

*  First build a little bead, blow a bubble in, and then add more glass and decorate before shaping and blowing it the final time. The starter bubble is nice, just to be sure you are really going to have a bubble in the bead.


* Because I wanted to show the bead being blown, I did not blow it in the correct way, which is pointing the mandrel towards the ceiling. Pointing the mandrel up seems to work the best for consistent shaping. I have also been told to take the heated
bead out of the flame, point it down for a moment and then point the mandrel to the ceiling so it will be a little stiffer on the outside. In reality, I point down and begin to blow, then move up to the vertical blowing position to finish.


* Make the tungsten pick really hot before plunging in into the bead. Turn up your flame if necessary- white hot is good! Make sure to keep the bead warm behind the flame so it won't crack. Look down the bead through the hole once you've plunged the pick through to be sure it is nicely opened up. If not, try again.

*  When you are ready to pull the bead off of the mandrel, be sure to only heat the mandrel, not the bead. Don't let the hot fingers get in the flame, or they will stick to and mar the bead.

I was not going to put this video up because of all the mistakes I made, but then decided, what the heck~ everyone is going to make some of these errors!

Here are some video links to folks who really know what they're doing!

You can watch Olga Alianova https://www.youtube.com/watch?v=atXlC1mxpo4

Davide Penso https://www.youtube.com/watch?v=Phb3vjDs1PE

My favorite https://www.youtube.com/watch?v=SgaN1q4enk0...

Tuesday, February 19, 2019

Lampwork Glass Curved Bead Tutorial- Making Curved Glass Beads


Well, I finally did it! After many requests and loads of questions from folks, I have written down everything I know about curving glass tube beads my way, which is in the kiln! If you look at the etsy listing for the booklet, you will see that there are a lot of disclaimers. Why? Because it will take some work for each person to get it right. This is not a tut in the traditional sense, but rather instructions, suggestions, a lot of information on what might go wrong and why and happy photos of some of the beads I have made using this method. It's written in more of a workshop style, with loads of information. I've really tried to include everything I've learned as I've explored this method over the years. Tester questions are answered and details I've explored are explained. I am happy to answer questions and lend support where needed.


Is it easy? Well, yes and no. Making the bead is fairly simple, and I have provided two short photo tuts to help with that bit. Curving them after they're made is a bit of a nail biter because issues can arise. This method of curving in a kiln came about through the help of a glass fusing friend of mine. It took a lot of fooling around and changes before I got a method I was really satisfied with.


Here's a little bit of feedback I've gotten on it~
'I just glanced through your tutorial and it’s really exciting. I made some assumptions about how you make your beads and not one of them were correct.'
' It's designed to encourage experimentation, and shows you a way to create these distinctive, curved beads without any special equipment. The entire process is very clearly expressed and even includes a nice introduction to making long tube beads in addition to the info on curving them. It's really like being in the workshop with Laurie and watching her process and learning from her years of experience. No, it's not a plug-and-play, effortless, "copy this and you'll get that" kind of tutorial. To me, it's much better, because it shows you a whole way of looking at your work methods.'

I have tried some other methods and read up on others. I've had more success with this method than with the 'Tom & Sage' method (which is pretty cool) or using a curved mandrel. The curved mandrel has a few problems in my book- first it is not really all that curved, secondly it is darn hard to get the beads off, and thirdly it is simply difficult to build a bead on a mandrel that is not straight! There is also a method where the bead is built on something flexible and curved while it's hot. Sounds interesting though I have not tried it ~ it sounds a bit scary and I don't like the texture left inside by the flexible rope!

Here's the etsy listing link:
Glass Bead Workshop~ an exploration of curving tube beads in your kiln