

A fusing pal of mine likes using collage-style glass in some of his designs. You know- the kind with streamers and confetti all over it. The problem is that stuff can be a bit pricey. Since I had tried making glass shards once or twice with decent results, we decided to have a shard-making workshop. We ordered some blow tubes, had a nice stainless steel can at the ready, filled a little jar with some water, put on our safety glasses and went to town. I had looked up some shard-making instructions to refresh my memory.
If you've ever made a hollow bead, you pretty well know the drill. Heat the tube to a nice glow and add a wrap of glass near the end of the tube. Then start wrapping glass on top of that first wrap, making a nice disk and then slowly bending the disk into a globe shape and closing it off. Watch for any holes, close them up, heat the whole thing and then carefully blow out to a thin, but not too thin, thickness. Drop that bubble in the steel can and let it break apart, then clean any remaining glass off the tube by plunging in water if necessary. (One more caution- make sure any tube you are using for this is dry- steam is very hot).
Building a good disk can be a bit of a challenge if you've never done it before, and my friend hadn't. I had some problems with my second disk too. And it was a bit slow- so I started thinking outside the box. Why were we being told to build a hollow globe? What was the need for that when we were going to be blowing a bubble into it anyway. Glassblowers start out with a big molten blob at the end of their blowpipes- why couldn't I do the same thing? And besides, we're blowing shards- it doesn't really matter if they are the same thickness or not.
This morning, I went to the torch and tried out my revised version of shard blowing. I've got a few photos that I hope will help you through this. This was much easier and quicker for me.
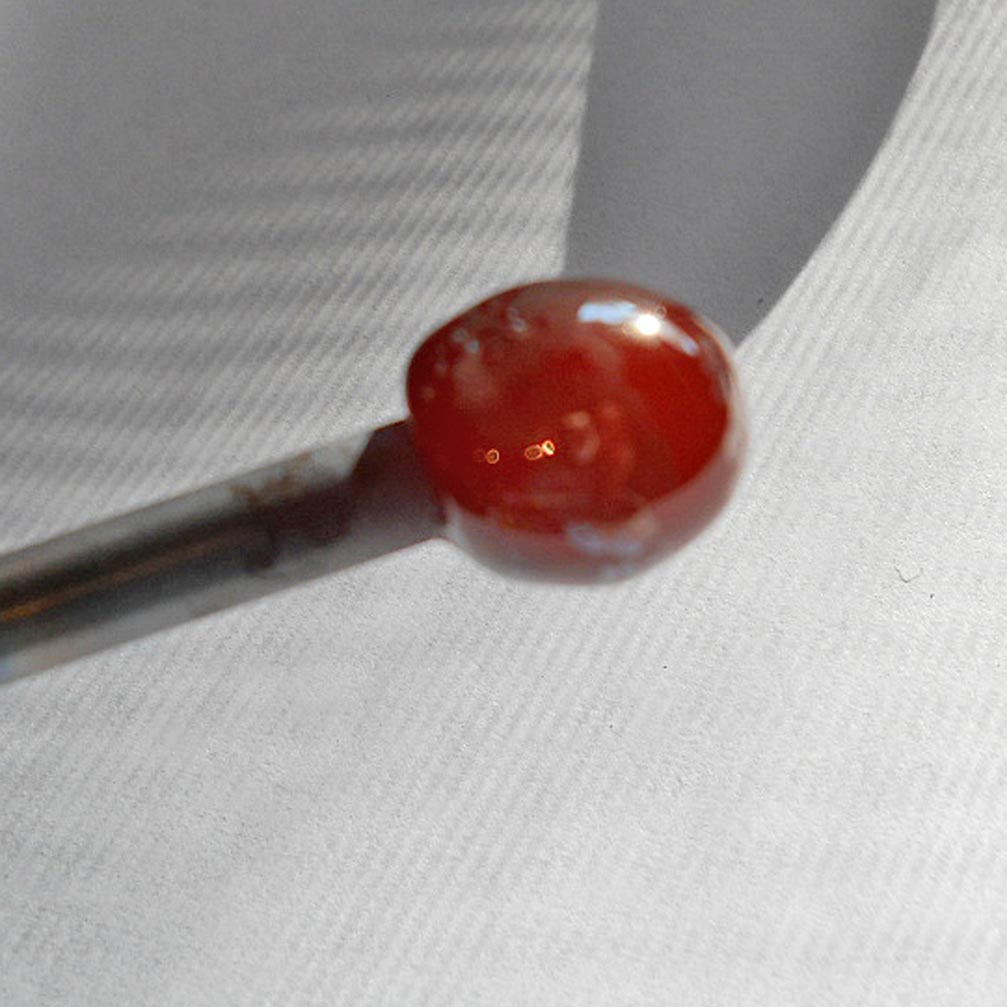
1) Heat the end of a 1/4 inch diameter hollow tube to glowing and add a wrap of glass (I used black) about 1/8 inch from the end. Wrap around a couple of times to make a small disk- 1/4 inch high is enough.
 |
| step 2 |
2) Start building a tube onto the front of that disk- parallel to the blow tube. Build it fairly straight out until it is about 3/4 inches long.
 |
| step 2-3 |
3) Close off the end of the glass tube and round up in the flame. You may use a tool to help round up if desired. If there are any holes, close them with a blob of glass.
 |
| step 3 |
 |
| step 5 |
5) Wrap the entire globe with more glass- all the way from top to bottom two or three more times. You can begin adding some more colors if you would like at this point. You should not have any holes as you are adding several layers of glass.
6) Heat globe and dip into frit if desired. I used raku frit. Give another small puff of air while the blob is hot. After adding air, hold your thumb over the hole for a minute, tilting the tube up slightly while turning.
 |
| step 6 |
7) Heat, melting everything smooth. Use a tool to shape if needed.
 |
| step 7 |
 |
| Step 8 |
 |
| step 9 |
9) Heat to a nice, even glow, remove from flame, and blow out carefully. If it collapses, let it melt together, heat and blow again. Rather than holding the tube straight, point it down slightly while blowing (remember, do this out of the flame). For me, one steady blow seemed to work best. Pay attention and don't let one portion blow out too thin and burst. The thin airborne shards this creates are dangerous to breathe. This one did blow out a bit as I was taking the photo.
10) Carefully put the blown out globe into the steel container. You can tap it carefully inside the container (protecting your eyes), or just put it in the container and it will break on its own.
That's it! You can put the blow tube into water to try and pop off the little bit that may stick, or just heat slowly and build your next shard bubble right onto it.
5 comments:
Looks beautiful but your health warning scared me! ;0)
What an interesting post/tutorial with lots of helpful information! Sometimes necessity is the mother of invention.
What a fascinating idea. I just started making glass cabs this year - basic glass fusing in a kiln - and have become completely enamored with what happens when glass mingles and flows together. I took a lampworking workshop three or four years ago, and never stayed with it, but now you've got me thinking that I could somehow combine all three. Great post! (And I love the name of your blog - Isinglass!)
(P.S. You've been BLOG MOBBED!)
Wonderful tutorial!
Cheers,
Madge
Glassprimitif- I just didn't want folks to try this without thinking. It's not all that hard. And it's only as dangerous as you make it! The flying ultra thin bits of glass are not a good thing.
Post a Comment