Sunday, December 4, 2011

Scrap fishies

 A couple of months ago, I decided to try making a fish by using up some of the twistie scraps I have lying around. I was pretty please with it, so I've made a couple more recently. They have a kind of different feel to them than the fish I normally make. First I make a clear core, then cover it with a color that accentuates the scraps I'll be using. Next they are rolled in silver foil, which I burn off to give a natural, organic look, and then the twistie scraps are randomly applied.

The other day, when my gas was running out, I took a clear rod of glass, heated it and applied the twistie scraps to it, melted it into a blob, and then twisted it. Kind of re-twisted twistie. The first fish pictured is the one I used that on. I ended up twirling it a bit on each side of the fish body to give it a nicer look. You can see a bit of silver haze on the bottom fish- I really like this look.

One thing about using scraps- I tend to use colors I wouldn't normally use together. It's always nice to try out some different things and see the results!

Sunday, October 30, 2011

Taking Photos- New Backgrounds, New Ideas

Ever since my scanner broke a couple of years ago and I had to start learning to take  my online photos using a camera, I have struggled with what looks good. Generally I take a photo on a white background, and then photoshop it until it looks better. That takes a lot of finagling- I have to sharpen it (my photos always look a little blurry to me), cut it to the right size and shape for my online shop- I use 300 dpi, and cut it to 3x3 inches, though that doesn't work with everything, and then I have to lighten, brighten and adjust the color to make it look right- especially the stupid white background. It's really more energy than I want to put into each picture I take. The white background is a real bear, and black just doesn't seem to work at all for me. Maybe because I don't have any kind of official setup to use, like a light tent or proper lighting.

Oh, that's another thing- taking the photo itself- I use a rather high powered halogen lamp, lighten the exposure by a couple of clicks and shoot a closeup without a flash. My old garage-sale camera actually worked better as the flash wasn't so harsh, so I could actually use it. The flash on my present camera is covered with a little piece of paper as it washes everything out, no matter how far away it is. The scanner was really easier, and I might even go back to that if I could!

So get to the point already!!! Well, I have, by necessity, taken to using different backrounds with my photos, and I am kind of liking them. The autumn leaf background is cool- no messing with trying to get it just right- I can just concentrate on the item I am trying to feature- I like that a lot! And the newest map background, though I still often correct the 'level' to make it whiter, is kind of fun, and it is not very noticeable if it's not all bright white. And it has the advantage that I might just see a word I like and use it to name the piece. Woohoo- a twofer!
I'll be keeping my eyes peeled for more fun backgrounds in the future.

Tuesday, October 25, 2011

Portal bead goes to Austria

One of my portal beads is the focal for this lovely piece, made by Marianne Cornelius (see link below)
It is made of woven silver wire with garnets.
Marianne paints some wonderful watercolors, as well as making some very nice jewelry pieces. I have no idea how she found my beads on etsy, but I'm glad she did!
The neckpiece is currently on display at this gallery in Vienna, Austria- http://www.spiegelgasse8.com/ 
I am always so excited to have something of mine travel to another country, and having Marianne use one of my beads as a focal to be displayed in a gallery in Vienna of all places was doubly exciting!

Please go here to see more of Marianne's wonderful work:
http://www.mariannecornelius.com/


Monday, September 19, 2011

Glass Fish Inspirations

Lampwork glass fish are one of my favorite kinds of beads to make. They are a lot of fun to wear all by themselves as pendants. Most folks who purchase them use them in this way, so I bail them and put them on cords before I ship them out.
I find you can do almost anything with a fish body and it looks pretty nice. Last week, I decided to try making a couple of more realistic fish. The first thing I did was to search the internet for photos of fish that looked interesting to me. I was looking for bright colors, colors I might not normally think to mix together in a bead, and interesting patterns. One of the fish that interested me was a clown trigger fish. I changed up the color just a little bit- adding a little more green than was strictly called for, and came up with a sweet little fish that was quite different from others I'd made. I used Thompson glass enamels for some of the color- I like the way it works when I want to imitate a natural pattern.
The next challenge I set myself was to use up some of the glass twistie scraps I had lying around. This one is purely a fantasy fish, with a base of white and silver and a lot of pastel colors that meshed nicely.
The last fish I'll be showing today is what I'm calling a sari (or saree) fish. It is an idea I'm still working out, where one pattern is pulled across a different base pattern, just as a sari is draped around a body. This red one is my favorite in that design.

Sunday, August 28, 2011

Hurricanes make me want to eat soup!

The weather here, though it is many miles from the eye of Irene, has been rainy and windy all day long. Reminds me a bit of my childhood in N.O. When hurricanes were near, we taped up the windows, filled the bathtub with water, checked the canned goods stock, filled up our individual giant red water bottles and prepared to hunker down for a while.
I always liked the feeling the low pressure gave me; it made me excited and a little bit scared . We were lucky that none of those hurricanes were really close enough to cause major damage. Afterwards, I have to admit, we went out rubbernecking- to see trees blown down and roofs on houses that were being built blown atop other houses.
Today I just did the hunkering down part and, since I am living in the frozen north, decided it was high time for a bit of mushroom soup. In typical fashion, I did not measure, but I will give y'all some guesstimates at how much of what I put into the old pot. This only makes about 2 or 3 cups of hearty, very mushroom-y soup. If you are a vegan, you can just use water instead of yogurt, and you may not want to use the beer unless you know they didn't use isinglass for clarity.
1/3 onion........................2 carrots
7 oz. mushrooms...........1/4 cup frozen or fresh corn
Chop onions, peel and grate carrots, and cook in oiled pan, stirring over medium heat until almost soft. Add corn. Cut mushrooms into slices, then cut across two or three times. Add to other veggies.
Add spices- 1 1/2 t. curry powder, 1/4 t. ground pepper, 1/2 t. garlic, a little basil, salt if you want, and anything else you think will be good. Cook all of this until nice and soft- mushrooms may get squeaky- that's good.
Add 1/4 cup beer, 1/2 t. good soy sauce or tamari and 3/4 cup water. Put the lid on and let this simmer.
In the meantime.... Make some roux.
Melt 2 T butter over low heat
Add 1/3 cup unbleached or wheat flour and whisk in until no longer lumpy.
Add 1/2 cup yogurt and whisk in until smooth. Add enough water to make it about like a thin mayonnaise- maybe 1/4- 1/2 cup. Turn off heat.
When the soup stock seems to be well cooked- maybe 15 or 20 minutes of simmering- pour a little bit of the liquid soup into the roux, mix, and then pour roux into the soup stock while stirring. Let that all cook over extremely low heat for just a few minutes. Keep an eye on it and stir occasionally. Delicious served with Welsh rarebit, or crackers, or something else!
I couldn't help but add a picture of one of my 'portal' beads- like the eye of the hurricane!

Monday, August 15, 2011

Here's a little something made by my friend smokeylady54 on etsy using one of my lampwork glass fish beads. Isn't the tourmaline and silver background perfect? And it comes with a sweet pair of earrings too!

For more pictures and more goodies, visit her shop here: www.etsy.com/shop.smokeylady54

Friday, August 12, 2011

Fruit and oat scones recipe

Many years ago, I found a recipe in a newspaper somewhere for these. I have made my own little conversions. They are one of my favorite low sugar treats- a bit crumbly sometimes, but delicious nonetheless. A little bit of butter on them would not be a bad thing!

Fruit and Oat Scones...........375 degree oven, 30 mins.

1 1/2 cups whole wheat flour.............1 1/4 cups oats, lightly roasted
1 T. baking powder..............................1/4 t. salt
scant 1/4 cup honey.............................1/3 cup butter
1 1/3 cups dried fruit cut into raisin-sized pieces
1/3-1/2 cup milk.................................. 1 egg, lightly beaten
1/4-1/2 t. cinnamon

Mix together dry ingrdients- flour, oats, salt, bk. powder. Cut in honey and butter til mixture resembles coarse crumbs. Stir in fruit. Add milk and egg,mixing until just moistened. Add cinnamon. Push into ball and knead gently 6 or 8 times. Dough will be a little sticky. If it is too moist to knead, add a small amount of extra flour, no more than a tablespoon at a time.

Pat out dough to form 8" circle on a lightly greased cookie sheet. Score into 12 wedges using sharp floured knife. Bake at 375 for 30 minutes. Cut or break apart while still warm.

Dried apples, apricots and golden raisins are a nice combination of fruits to use.

Yum! I should have been making these instead of typing this out!


Monday, August 8, 2011

New 'Widget'

Well, I was chatting with some folks the other day, and noticed that one of them had this interesting thing on their blog- a little slide show of things in their etsy shop. When I asked about it, the explanation was rather vague. But then I right clicked on it and saw that it came from http://www.craftcult.com/

If I can do this, anyone can! Just go to 'widgets' at the top of the page, the 'etsy shop' tab, fill out the info, copy the code, and add it to your blog gadgets. There are a lot of ways you can customize it- different backgrounds or shop sections. Mine is just the sea life section of my shop for now. Just a little something for fun!

Monday, July 11, 2011

Lampwork Glass Bead Rescue and Repair

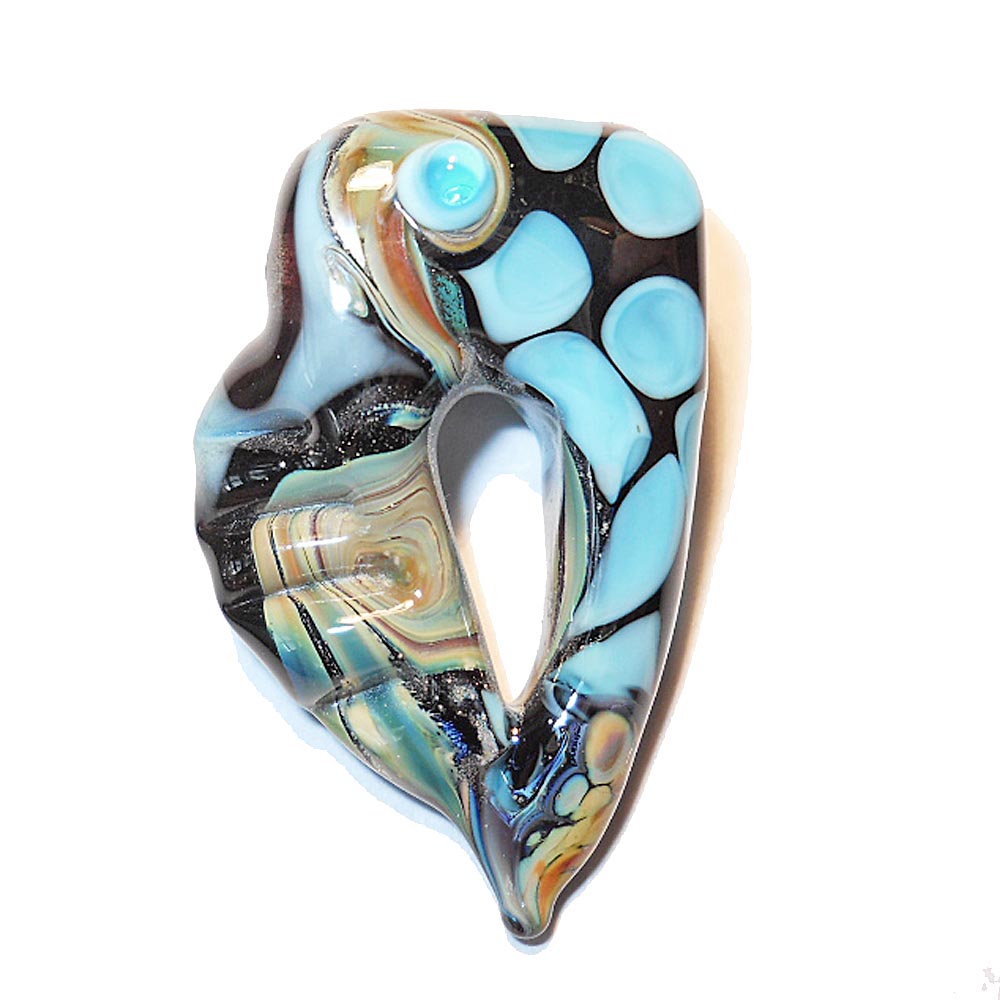
Here's my newest observation- wind is the enemy at outdoor shows. Well, not really a new observation, but still important. I was reminded of this recently when the wind grabbed my table and flipped it completely over onto my beads, which were now on concrete. The result? Too many broken beads. After a couple of days moping around, and the comment ' fire polish them' niggling in my brain, I realized that I had a kiln and I am not afraid to experiment with it. So I grabbed a couple of my minorly 'scuffed' beads, jammed them onto some sludged mandrels, and got to work. I'm here to tell you what I learned, just in case you need the info some day. I'm not going to go through the whole grueling process, but will just get right to my recommendations.

There's one person I need to thank for suggestions and ideas in all of this- that's Lynne of Fireball Beeds. She had some great ideas and suggestions to help me along the way. Here's her blog: http://islandgirlsinsights.blogspot.com/

The repairs I have done are fairly minor- fish fins, eyes, scuff marks and small dings. These types of repairs go pretty quickly. This is by no means a foolproof method. Sometime beads crack or break dramatically during the process. But I had a lot of lemons on my hands, and I just needed to try and make some lemonade!

********NOTE: Your safety is your own concern. I am not recommending that you try any of these procedures, just telling you what I have done. **********
Here's what I do:

1) Put the beads on sludged mandrels. I have tried this with both wet and dry mandrels. Either can work, though it is nearly impossible to push a bead down onto a dry mandrel. If using wet sludge, it helps to make it a bit thin. I put the bead on the mandrel, pull it off and wipe off the wet sludge, then put it on again. This helps me keep from getting a lot of junk at the end of the bead.

Either way, I like to put a 'stop' at the handle end of the sludge to keep the bead from falling onto my hand- a bit of thick sludge that the bead cannot slide over. Since the bead can get loose when heated, I am extra careful not to point the mandrel down so that the bead can fall onto my hand, the floor or the table. The stop needs to be made with thicker sludge.

2) Put the beads into a room temperature kiln with the ends sticking out 4-6 inches. I only put in about four at a time since I don't want to take a chance that they will touch each other and stick together. If that happens they will certainly be ruined. I turn the kiln to a low temperature and slowly ramp up to about 800 degrees. My kiln does not have a digital controller, so I turn it to low until it reaches about 300 degrees, then turn it to 3 until it reaches about 600 degrees, then 5 up to 850 or so. After that it can be allowed to ramp up quickly. The target temperature is 1200 degrees. I keep an eye on it so that it doesn't get any hotter than that.

3) Let the beads 'soak' for 5-10 minutes at between 1100 and 1200 degrees. This allows the heat to get to the core of the beads. Lynne likes to hold at 1200. I let the beads get to 1200, and then allow them to cool to 1100 and let them soak there. This is because I want to be sure the beads don't start distorting before I torch them.

4) Make sure the mandrels aren't too hot to handle. If they are, I take a damp paper towel and cool down the handle end. I also pull them a bit farther out of the kiln if necessary.

5) When I am ready, I turn on the torch, and make sure I am wearing protective eyewear. I want to grab the beads and get them into the flame as quickly as possible. I am mindful of the danger at this point- moving quickly but carefully around the lit torch.

6) Put the bead into the flame and heat slowly. DANGER- the bead can shock, crack, break, or explode at this point. It is very important that the bead is hot, and that I move quickly. This is rather similar to the initial heating of a rod while making a bead- in and out, up and down, slowly into the sweet spot in the flame.

7) Once the bead is glowing, I am ready to work on it again. I have now done quite a few repairs in this manner, and am fairly happy with the results. It is not a perfect solution, but oh so much better than tossing alot of what used to be lovely beads.

8) Turn the kiln down to proper annealing temperature. I generally do this as soon as I am done working on the first bead.

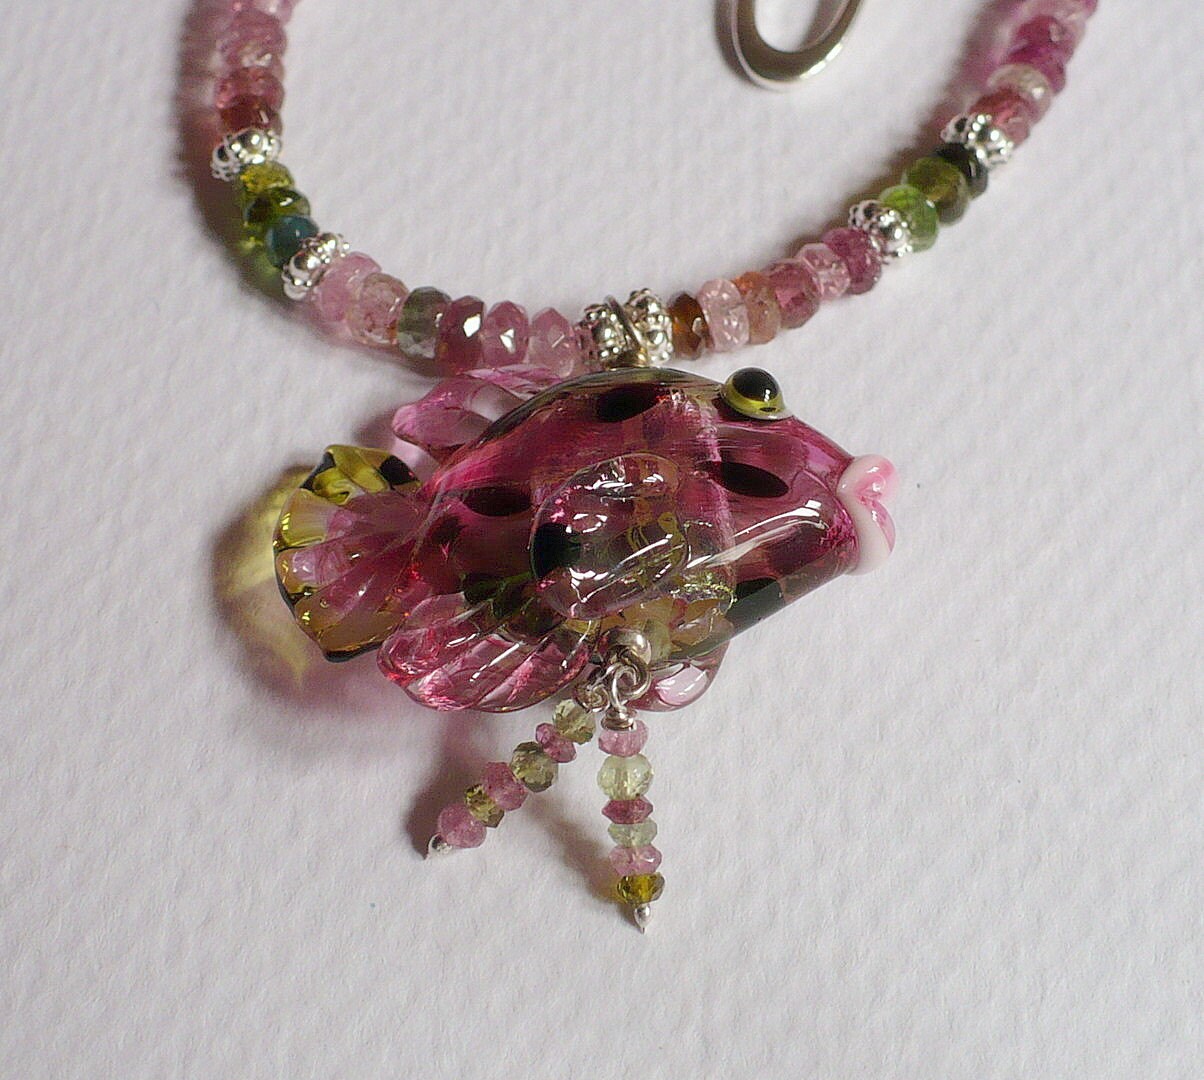
You can see the photos of the fish with a broken fin at the top, and the repaired bead below.


Wednesday, July 6, 2011

My daughter's work

Well, it's time to pump someone else's work for a change- something that's not lampwork too! My daughter has recently begun designing t-shirts. She is submitting these designs to a site called threadless, where folks rate the designs and the ones that get the best ratings get printed. The designer then gets a cash award. I think she's doing some pretty nice work. This design, which is called 'dreamlight' is only the second design she's submitted, and I've seen proofs of some others that are in the works. More good things are coming. So, if you are so inclined, I hope you'll go here, check out the design, and rate it. We appreciate the support. http://www.threadless.com/submission/352062/Dreamlight


Thursday, June 9, 2011

Hothead torch gas

Well, after using a hothead torch for upwards of 11 years, I finally decided to try using a bulk tank of propane, rather than my usual propylene. I had heard, from time to time, that folks use it and are happy with the results. It is quite a bit cheaper than the propylene I normally use, and much easier to find.

My findings are completely un-scientific, but, in my unbiased and totally correct opinion, it was a big mistake. I hate it. Yup, HATE it! Why, you may ask? Well the main problem is I get muddy colors. The aquas and greens tend to turn a little bit red, the gold pink gets murky- in short it is unreliable, and I really like nice, pure colors- the ones I thought I used, not some random colors the gas decided to give me. I love organic colors, raku frit, reactive glass, silver reactions, but this is a whole different animal. The beads I made using the propane won't be sold online- they're just not nice enough! They will end up being bargains at my table, until I get tired of looking at them and just end up giving them away!

As far as finding propylene, if you are looking, be sure to call all of the welding supply places you can find- the price varies wildly. And one more thing- no matter what gas you decide to use, don't let the tank get too hot- the gas will act erratically if you do. And be sure and drain the line at the end of each beadmaking session unless you want to see a large green flame that doesn't go away when you turn off the torch!

P.S. the fish at the top of this bit of chatter was made on a hothead torch, using propylene gas.

Tuesday, May 24, 2011

Beads for Japan

With the ease of gathering worldwide news these days, it sometimes seems as if one tragedy after another is occuring, each quickly overshadowed by the next. The earthquake, tsunami and nuclear disaster in Japan is just a couple of months behind us, and already it seems we have nearly forgotten this awful trio of events that devastated Japan.

I'm so glad the ISGB (International Society of Glass Beadmakers) has put together a fundraiser to help out the people of Japan in a small way.

I can't imagine what it must be like living in a country with such a large population and such a small bit of land that has suffered so many things all at once. The ISGB will be selling beads made by its member at the annual Bead & Button show in Milwaukee, WI in June and donating the funds to the Japan Disaster Relief Fund of the American Red Cross. I've sent off 10 of my hollow Japanese lantern beads to be sold there. The price is pretty nominal- I'm kind of hoping that folks will donate a little extra when they choose a bead.

Thanks to the ISGB for putting this together. And if you are a member, I hope you will consider making a donation as well.

Friday, May 6, 2011

Farmer's Markets and Me

Well, it's finally that time of year again up here in the frozen north- farmer's market season, and boy am I ready! I'll be at the market in King Ferry with all of the glass I've been making this winter- which means I'm stocked to the gills. Loads of fish, pendants, necklaces, portals, and beads, beads, beads! All of them my handmade lampwork glass, of course. There will be lovely hand spun woolen yarns, felted jewelry, some gently used high end clothes (lots of Flax), and who knows what kind of yummy foods. It's just the beginning of the season, but I'm hoping folks will be ready to come and see what's on offer.
The weather should be beautiful!


I've been selling at farmer's markets for years, and I love the feeling of equality and all of the amazing things you can find at them. Loads of locally handmade goodies- both food and artisan- made goods. And lots of lovely people too!

Which brings me to another point. I have been noticing lately that some of the markets are excluding crafts, or only allowing 'farm made' crafts. What a pity! Some folks seem to think that artisans have plenty of other places to try and make their living , and shouldn't be allowed to ride on the coat tails of the farmers. Now I do realize that the main reason people go to farmer's markets is for the food and that is as it should be. But I feel strongly that juried crafts should be allowed as a part of the 'buy local' movement that many small farmers are proponents of. And small artisans can be a wonderful addition to the markets, bring in more people and add to the 'buy local' atmosphere. Not to mention that artisans can really use the steady source of income that a sensibly priced market can offer. After all, one can only afford so many craft shows in a year.

Yes, my raw materials come from Italy, but from the point those materials enter my home, I do everything to make them into original little pieces of art glass. Lampworking was becoming a dying art until about 18 years ago, when there was a bit of a renaissance in the U.S. and consequently around the world. Handmade pottery, blown glass, woodworking, metalworking- all of these arts and more should be encouraged. I'm not talking about things you might learn in a class at one of the major craft stores, I'm talking about artistic crafts that take years to perfect.

It is my sincere hope that the farmer at the markets will find a way to continue to include high quality arts and crafts. I'm sure there are groups of artisans who would be willing to act as a jusy. The market in Baton Rouge, LA. is a wonderful example of a way to make this work. There is an arts market once a month, juried by the local arts council. It is a very successful program, which you can find out about here: http://www.artsbr.org/

Friday, April 22, 2011

Yes, published again- Bead and Button

I'm sure everyone is tired of hearing about all the exciting bead things that are going on around here. No need to be jealous- my life is quite complicated right now in many ways.

I just received my advance copy of the June issue of Bead & Button magazine with a guide to lampwork terms for folks who love lampwork, but don't know what all of those wacky terms mean. It's on pages 20 and 21- one of their 'Expert Advice' columns (no, I do not call myself an expert- that's their thing).

Anyway, it's pretty exciting for me. If you look at the little words along the bottom of the cover, it says 'Shopping extra: A guide to lampworking terms p. 20'

Friday, April 15, 2011

A published tutorial

Woo hoo! I just received the June copy of Bead Unique magazine with my tutorial for making this bead style! I'm so excited! This is my first time to be published in a magazine that folks can find at their local newsstand (i.e. Barnes & Noble). The tut has info about using silver foil. If you've never tried it, this is a fairly easy place to start.

Here's a link to their website:


Friday, March 11, 2011

Beads in Space- Beads of Courage, NASA, and Me

First, let me say I'm pretty excited that one of my beads was chosen to go up in the final trip of the shuttle Endeavor on April 19,2011. How did this happen, you might ask? Well, here is the story in all its glory. But first, a link and a look at all of the beads that will be joining mine:
https://picasaweb.google.com/101652927073622680837/BeadInSpace#

I'll just tell my side of the story. I don't know how Beads of Courage and NASA got together for this event, but I was sure glad, and lucky, to hear about it. One of my friends on facebook mentioned that she was making beads for a juried competition for glass beads to go up in the shuttle. You know how random it can be seeing what any one person is up to on facebook. I saw that and had to look into it right away. I was very disappointed when I heard about it too late the first time, so I was happy to be able to give it a try this time.

My father was a NASA engineer, so space has been on my mind for pretty well all my life. When I was growing up, space travel was still pretty new, and my father's work was leading up to the moon launch. The first clue I had that he might actually be doing something important was when I was in my late teens, and something was going wrong with one of the missions. My dad was pacing and thinking by the phone, sure that they were going to be calling him about something. I think he was a little disappointed when they didn't call.
So I got on the torch and went to work. My first series of submissions was a ufo, an alien, and a Saturn rocket ship. These beads were so hard for me to make, because they could be no larger than 1 1/4 inches in any directions- that's a little rocket! I hurried and sent them off a few weeks before the deadline,. But as it turns out, I wasn't done. For about a week, an idea kept developing- I wanted to make a man in a grey space suit with bumps along his legs and sides. But could I possibly make it so small? Finally I just had to give it a try. I made one, figured out what I could do better, made another, and crossed my fingers. I also thought I'd try a more colorful rocket if I was going to enter again. So those two and an 'earth rise' bead were my second set of submissions. The little space man is the one going into space- I'm so glad I tried again!

So, when April 19th comes along and Endeavor takes off, I'll be thinking of my dad and my mom- whose birthday is on the 20th. Dad would be so excited!!!!! Here's a link to the NASA website, where you can watch the progress of the mission:

Monday, February 28, 2011

Two publications

I can't believe I didn't write a blog about this already. I was chosen as one of about 150 women to be featured in the Flow's Women in Glass winter issue. Here's a bottle they chose. Great glass, lots of tuts, and a lot of information. All for just $9 plus shipping- or get a digital copy!


Here's a link:
And I just got a copy of the newest glass beadmaking book 'Creating Glass Beads' by Jeri Warhaftig published by Lark Books. This mask- 'Lalala I Can't Hear You' is in the gallery on page 34. I haven't had time to read the book yet- but there are sure a lot of nice beads in it! Here's a link to Lark, though I don't know if the book is quite out yet.

Oh! And that means I got a free copy of each of them- Woohoo!


Sunday, February 27, 2011

Featured in a blog


Here's a blog someone wrote about my beads. Kglass did a wonderful job. There's a lot of nice glass featured, as well as jewelry and some ideas about business. Take a peek here:
http://kglass8.blogspot.com/2011/02/isinglass.html


And here is a link to her shop:

Tuesday, February 22, 2011

Girlfriend beads

Oh, I have a new bead style that I'm liking right now. So far I've only made four, and they're all princesses, but this idea isn't completely congealed yet. I decided while I was making one today that they don't always have to have a crown. So they are not going to be princess beads after all, but rather 'girlfriend' beads. Remember when tiaras were 'in'? I'm hoping that's all over with!
They can have different hair, skin, eye and background colors. And different background pictures too. Since there is a face on only one side, I have to work on making the other side interesting. I've got a new idea for that- we'll see how I do a bit later. For now, here are the first couple of princesses- the harried princess ( I keep wanting to call her Princess Harry!) and blue girl, who is a bit more staid.

Friday, February 18, 2011

The Woodwork of Irwin Seidman

Here's my new plan. Every once in a while I am going to show a little something from someone whose work I think is magnificent.

Today, it is the woodwork of Irwin Seidman. He was kind enough to tweet about something of mine, and when he told me about it, I had to go see what he made. Turns out he makes incredible wooden bowls, pepper mills, oil lamps, and other things. His pepper mills are on sale right now- a great addition to your kitchen wares.
I just love woodwork. My grandfather always had something cooking with wood in his workshop, and I have had the pleasure of working with wood a few times in my life. I love the feel, the patterns, the colors- it's all good! And Irwin does beautiful things with it.

There are also some lovely paintings from Susan Seidman.

Overall a wonderful etsy shop!
Here's a link:

Saturday, January 22, 2011

Leaves again! Lampwork glass beads for demos


I know I mentioned this idea before, but wanted to bring it up again. I've started working on making a few leaves to use along with a demo.
I love to demonstrate for kids- schools, scout troops, whatever. And I know they don't have a lot of spare cash for this kind of thing. But doing it for free just doesn't work for me any more. I have finally come up with a new way to make this work better for both of us. The kids love to bring home a souvenir, and what better than something they can watch being made?
So now I offer a demo for a sensible fee, or they can buy a leaf for each child for about $5 and get the demo for free. It's win/win, I think. I bought my leaf press years ago just for demos. It's a nice quick thing that even an adult with a short attention span can usually manage to sit through. And it gives that nice 'aha' moment when the leaf is quickly pressed into shape. Of course, me being me, I always have to pull out the scissors and reshape a bit too...

Here is the link on this very blog to an easy photo tut to make some quick little crowd-pleasing leaves. http://isinglassdesign.blogspot.com/2010/01/quick-pile-of-leaves.html
Look! I made a youtube video too!

Thursday, January 13, 2011

Clean, clear glass for your lampwork glass beads


Sometimes things just seem to come together- like when I was listening to Abbey Road while doing my high school English assignment and realized that the Beatles had used an old English poem in one of their songs (Golden Slumbers). Got my class out of a whole day of work when I brought it along to school! Woo-hoo!

The same thing happened when I saw this information about making your clear glass really clear posted on facebook by Patty Frantz: http://frantznewsletter.com/?p=2914&preview=true

Now normally, this would just go to the back of my brain, because I am not likely to want to have any sodium bisulfate lying around. But then I mentioned it in passing to the man I live with, and he thought I was talking about dill pickles. And THAT reminded me about a library book I had been looking through that mentioned a homemade metal pickling compound made with vinegar.

So I went in search of that info on the internet and ended up here:
http://idreamicanflyaway.blogspot.com/2009/01/to-pickle-or-not-to-pickle.html
Please read through this for much more specific info about the pickling solution.

Now I had all the information I needed. Would it be possible to make my own pickling solution, use it on my glass per Patty's instructions, and end up with a beautiful clear glass? I think the answer is 'yes!' I tried it out and am very happy with the results. Please do read Patty's information- you use this the same way she suggested in her article, but this is a non-toxic solution.

First- about your safety- you are responsible for that. I am not saying any of this is safe or recommended by the AMA or the fire department!
Here's what I did-

1) Used recipe from 'I dream I can fly away'- 1 cup vinegar to 1 Tbl. salt- heated in a non-reactive (ceramic-lined cast iron a la le creuset) pot to the steaming point, stirred until the salt dissolves. I wouldn't boil this stuff.
2) Let solution cool to about 140 degrees. I put the clear and transparent rods into a 15x9 pyrex pan and poured the solution over them. Don't pour it over when it's too hot, or the rods may crack. The clear I am using for this is Moretti #006. All the transparent colors are also Moretti.

3) Put that into an oven that is set to about 150 degrees. I left the door open so it wouldn't get too hot for about 15-20 minutes.
4) Took the rods out and rinsed in tepid water to remove the salt. Handle the rods carefully or use gloves so that the rods don't get oils from your hands on them.
5) Stood the rods upright to dry on a couple of paper towels.

That's it. When the rods were dry, since I didn't have gloves, I picked them up using a plastic grocery bag, bundled them according to color using twist ties, and put them into plastic bags to try and keep all the dust from my house from getting on them. That is the next challenge- how to keep the rods clean!
You can keep this stuff in a non-reactive container and reuse it. Though I haven't tried it, it seems you can also 'refresh' it by adding extra vinegar. And when you do dispose of it, it should be neutralized with baking soda.

Yes, you still need to clean with 91% alcohol to get all those nasty fingerprints off, and you may still need to pull a bit of smutz off the tip from time to time. But this is definitely worth the time it takes- which is not much. Now I can encase without fear- if I could just do it without smear!

Here are couple of the beads made with my newly cleaned clear. I normally don't even bother with this type of bead because of the smutz factor. With that problem out of the way, maybe I'll finally get down to the business of learning to encase properly!
A very special thank you to Patty Frantz and to Jo Hollingsworth- you two rock! And thanks to Larry Scott, who told Patty about this to begin with.

Thursday, January 6, 2011

Epiphany! Lampwork glass beads for Mardi Gras

Well, today is the first day of the Mardi Gras season, aka Epiphany. The season always begins on the same day- the twelfth day after Christmas, no matter when Mardi Gras actually falls. Of course you know that Easter is the first Sunday after the first full moon after the first day of spring. And Ash Wednesday is 46 days before Easter- the beginning of Lent. Well Mardi Gras (fat Tuesday) is simply the day before Ash Wednesday. The whole mess lasts right from Christmas to Easter, with some of the days for celebration, and some of them days of moderation.


If you want to know more about all of this, you should visit this site- it has loads of info about everything from the Mardi Gras Indians to Pete Fountain's Half Fast Walking Club- well at least I hope they include that! No Mardi Gras morning would be complete without a bunch of extremely drunk men walking by, attempting to play music, and kissing everyone in sight at 5:30 am or so...
http://www.mardigrasneworleans.com/mgdates.html