Showing posts with label glass fish. Show all posts

Sunday, May 21, 2017

Murrini!

My murrini is on the purple, Kaz's on the blue and orange
Oh my! I've gone on a murrini making binge. I bought a few from Kaz Baildon in England, but couldn't wait for them to arrive, so I got a rod nipper and began making a few of my own. Still working on making them turn out as I have envisioned them- right now, some come out quite nice and others, well, not so much. But, because I'm making them, I must also learn to use them. I have resisted this whole silly thing for more than 15 years! Now? Well, I may be getting just a wee bit addicted....


If you are not a bead maker or glass afficianado, you may wonder what the heck a murrini is. For your edification, I must, as usual, point you to the wiki about such things. One builds a tube shaped blob of glass using a lot of different colors, pulls it into a rod and then cuts thin bits off of it. These cross section pieces have sweet designs in them that get placed onto the hot bead. They can look like just about anything- the classic use is in a millefiori (thousand flowers) design, where piles of flowery-looking murrini are placed all over a piece. But a murrini doesn't have to look like a flower- it can be a fish, a heart, a star, your initials- anything, really!

So now on to the small touch of something I think I've learned. First, in the purple fish pictured- the murrini at the bottom is encased, while the ones at the top of the bead are placed on the surface and melted in. The encased murrini was an extremely thin slice which I simply laid on my marver and picked up with the hot bead. Because it was so thin, there was no worry about it shocking and breaking. And it was easy to melt smooth and encase. A nice use of those bits that are simply too thin to pick up, and it really shows off the design nicely.


Another cool thing is the 'barnacle effect' as seen on the tree bead. As best I can remember, I did not melt these murrini all the way down, but got them about 1/2 way melted in and then  put a blob of clear on top. Not exactly what I was going for- it looks a barnacle or eye-leafed tree, but it's a fairly fun idea that could be used effectively somewhere, I'm sure! Those wee murrini next to the tree are the ones I used on it, and my favorite pull so far- modeled after peacock tail eyes.

If you are interested in learning the art of murrini making, I can highly recommend the October 2013 issue of the Soda Lime Times. I read through all the different instructions there and ended up sort of combining things together. John Rizzi did a particularly nice job with his tut! The magazine also has murrini recipes from a whole bunch of different people. I have not attempted to follow any of those, but it was great to see see what folks do!

I use just regular tweezers ('cause that's what I've got!), but I have heard that it is helpful to have either tungsten tipped tweezers (so they won't stick) or some pipe and tube or universal cylinder tweezers from Micro-Mark. I have not tried these, but folks were pretty excited about them on facebook.

Wednesday, January 20, 2016

Form Follows Function


Looking around on facebook, I saw a wonderful thread with many lampworking tips and it got me thinking about one little lampworking detail that I think about a lot which is the first step in many bead style decisions, and that is- 'how will this bead hang?' I make a LOT of fish, so that's where I'll start.

If the fish has a vertical hole (as most of mine do), the front and back end need to be fairly well balanced. That means the front end of the basic body will be a little bit longer than the back end. Why? Because the back will have the fins and the tail added which, though thin, will add some weight. The side fins do not extend much past the hole, adding a little more weight to the front. Hopefully in the end it will all work out! One more thing; ever since my wind disaster, I have made my fish with the side fins against the body rather than sticking out to the sides. Much less fragile!

A horizontal hole on a fish is a bit more difficult for me. The bottom of the fish needs to be heavier than the top, so I mash it a bit unevenly and then try to extend the bottom a little more. Sometimes later in the process, when it's time to add the eyes, I can't remember or really see which is the top and which is the bottom. Today, I added a wee dot of clear at the top where I was planning to put the eyes. Problem solved~ now I wouldn't get mixed up later, and the clear does not mess with the design; I can just melt it and cover it up later. (thanks to Elizabeth Dauch for this tip)

Another new design change for those horizontal fish has made them work out so much better in my mind. No more worries about the tail being too fragile- it is now just another part of the bead.

One more thing- you might call this a pet peeve, I suppose. Both sides of any bead I make have a design on them. Why? Because they can flip over or be put on backwards and I feel they should still be nice to look at. Any time I put up a bead for sale anywhere online, I show both sides, and maybe even a side view.

There you have it~ one little step in the design of the bead that can be quite important. Or so I believe...

Monday, July 2, 2012

A Match Made- Well, at the Torch!

This is the finished pair.

Last week I put some pictures up on facebook of pairs of fish I was working on for earrings. I get a little particular when I'm looking for earring pairs. I can take a bit of variance in design, but the size and shape have to be fairly close. So I thought I'd fill y'all in on what I do to attempt to achieve that.

The first part is easy- make a wee fish! First- I count the number of wraps of glass I start the bead with, then take a good look at my starter bead and try to remember the size. I do give it a little bit of a measure against my graphite paddle (for all the good that does me...)
While I'm doing that I attempt to put all the rods down on the table in the order that I used them- so when I go to make the match it should be much easier (except that in the flurry of making the fish, I often make a few mistakes- so I still have to think!).

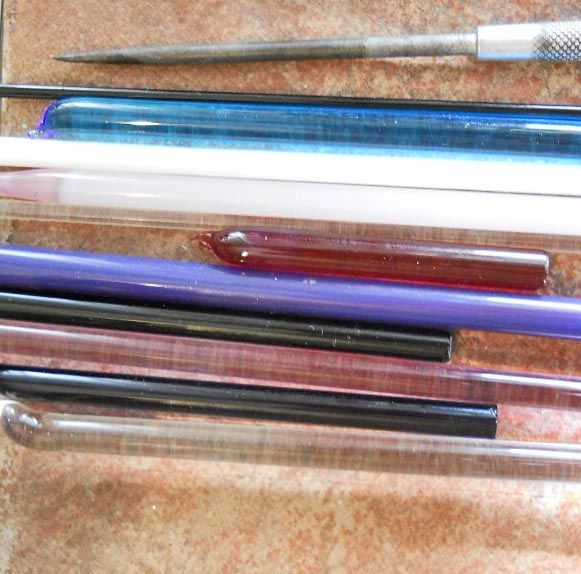
Here's a picture of some lined up rods. But they were kind of wrong. At least all the colors were there. The next thing is to find a way to measure so I know what I'm aiming for. Need to know both length and height, so I lay it across the graphite paddle again and mark it in my mind.
The first fish goes into the kiln and then I have to put on my thinking cap and cross my fingers.

Hmmm... I made three fish, but I have a bad feeling there is no match there. On to the next trick. Instead of blindly making more, I take the precaution of writing down everything I did just in case I need to try again the next day- which I did. Good luck trying to understand my goofy notes. But it did help. Gave it a read through, brought both of the beads to the torch for comparison, and got to work.

Whew! I think I got it- well close enough for lamp-work!

Wednesday, June 6, 2012

Kumihimo and Lampwork Fish- A Perfect Pair!

As just about anyone knows who watches me online, I make A LOT of lampwork glass fish beads. Why? Well, I love playing with the colors and designs. Every time I learn some kind of new lampwork trick or technique, I find myself thinking- 'I wonder how this would look as a fish?' And so off I go....
 
A few months ago a lovely jewelry designer named Libby found my etsy shop. She lives on the Atlantic coast, so was drawn to trying out my lampwork fish with some of her jewelry making techniques. I have to say, I am impressed. Her lovely Kumihimo necklaces are perfectly matched to the colors in the fish, and set them off wonderfully.
But kumihimo isn't all she does- the accent beads she used on the first necklace pictured here are just yummy!
Libby has two different shops on etsy- LadyBGems, which features her handmade jewelry and KittyKatGlassDesigns, which features her handmade fused glass (don't miss the June sale in this shop!).
I rarely get to see what someone has made out of some of the beads I created, and I'm just delighted with what Libby has done with these fish. Thanks for letting me share!

Sunday, December 4, 2011

Scrap fishies

 A couple of months ago, I decided to try making a fish by using up some of the twistie scraps I have lying around. I was pretty please with it, so I've made a couple more recently. They have a kind of different feel to them than the fish I normally make. First I make a clear core, then cover it with a color that accentuates the scraps I'll be using. Next they are rolled in silver foil, which I burn off to give a natural, organic look, and then the twistie scraps are randomly applied.

The other day, when my gas was running out, I took a clear rod of glass, heated it and applied the twistie scraps to it, melted it into a blob, and then twisted it. Kind of re-twisted twistie. The first fish pictured is the one I used that on. I ended up twirling it a bit on each side of the fish body to give it a nicer look. You can see a bit of silver haze on the bottom fish- I really like this look.

One thing about using scraps- I tend to use colors I wouldn't normally use together. It's always nice to try out some different things and see the results!

Thursday, December 23, 2010

Lampwork glass beads for the holidays

Happy Holidays all of y'all out in the blog-o-sphere (is that right?) I've been working on some big ol' beads this week, and a few glass icicles. I've made a few fish, a couple of birds, and some interesting shaped beads to hang on my tree. In order to keep them from getting lost in the shuffle, I decided to go large and see what happened. So here are the results of that experiment.

I have been asked a number of times over the years whether I can make beads bigger than I generally do, and I always say no. But I suppose I must admit that I was wrong. The answer is- we'll see. If these hold up, maybe next year I'll make some in time for some other folks to enjoy them on their trees!

Tuesday, June 1, 2010

Under the Sea

Well, I'm just bloggin' 'cause I'm sittin' here waitin' for an answer to an online question. Wanted to show a few underwater creatures, and wonder why folks like fish, turtles, frogs, shells, starfish, mermaids and other things so much. And what other underwater creatures can I make? I did make a squid once- well, twice really, because I didn't like the first one. Anyway, here are a few of my current favs.


Sunday, August 30, 2009

In defense of the hothead


I wanted to share a bit of information and opinion on the hothead torch, which is what I use. And what, you might ask, does that mean? And furthermore, who cares? Well folks making lampwork beads care- a lot in some cases- about what kind of torch a person uses. I am not a victim of 'torch envy' (thanks for that phrase to Corinna Tettinger). I am more a believer in 'what can I afford?' and 'what works for me?' So here is my explanation of what it is, and why I use it.
A hothead is about the lowest end torch one can effectively make glass beads with. It runs on a single fuel (I use propylene) rather than propane and oxygen. It has a rather bushy (wide) flame, and doesn't get quite as hot as a dual-fuel torch does. The flame cannot be made into a pinpoint, but it can be adjusted somewhat, especially if you are using a large fuel tank rather than those screw-on, ecologically wasteful, little bottles you can get at the hardware store. I use a large tank, and it makes an enormous difference in the heat and adjust-ability of the flame. So I definitely recommend using a larger fuel tank with a hose going to the torch.

Many people say they cannot work with this type of torch, but, frankly, a lot of them have never tried, or never tried very hard. Not that they should- they have better, nicer torches at home, and this does work a bit differently. I have even heard this referred to as not a 'real' torch. I have used this type of torch for about nineteen years, so yes, it works, it's real ( I have the burn marks to prove it!) and yes, you can do a lot with it- it just takes practice, as does using any torch.

The hothead does not get as hot as dual-fuel torches, so many folks think it is slower, but I am not really convinced of that. I have asked other beadmakers about how long it takes them to make a particular bead, and my times are usually equal to or even quicker than theirs. The first melt and wrap may go more quickly, but detail work takes time, no matter what torch you're using. And many new beadmakers have problems because their torch is turned up too high. I rarely have that problem. And, believe it or not, I actually don't usually work with my torch turned all the way up.

The hothead is an inexpensive torch- under $65, whereas dual-fuel torches start at about $170. Not really a huge difference, but there are a number of other costs that add up, the largest one being oxygen. You either have to buy a tank and transport it (which I don't want to do), or buy an oxygen concentrator, which can run quite a lot. Over the years, a dual-fuel torch might end up being less expensive, I suppose. That's some math I haven't ever done.

Lastly, I'm used to this type of torch. Yes, I can use dual-fuel torches (though I still prefer to have someone there to tell me if I have the flame right), but I'm most comfortable on my little hothead.

The one thing I don't like about my torch is that it is pretty loud. Makes listening to music hard, but not impossible. And I can't really hear the phone ring- that might be a good thing! I know I will 'upgrade' one day, but in the meantime, I am happy with my hothead.


Friday, January 2, 2009

Win This Fish!


Happy New Year!

This month (January 2009) I am contributing this fish as a prize to the Creative Glass Guild on Etsy. All you have to do to be in the running to win it is to sign up to receive the monthly e-newsletter here: http://cgge.org/emailsub.aspx
Why sign up? To find out what's on special in the CGGE shops, what the team promotions are, and other news. The CGGE is a non-juried group of glass artisans who sell on etsy. You can find lampwork, fused glass, stained glass and glass mosaics in a multitude of styles and colors. Here's a list of the members: http://cgge.org/members.aspx

About the fish you could win- I like to call this fish Ambergris- because it looks amber and the silver in the center looks kind of grey . It's handmade lampwork glass, made with Italian Moretti glass by me in my home studio. It has been well cleaned and properly kiln annealed.
Good Luck and have a great year!

Wednesday, October 15, 2008

Making Sculptural Lampwork Beads- tips and tricks


OK, it's time for a few sculptural tips. I never thought for a minute, when I first started making lampwork beads, that I would make so many different kinds of animals out of glass, not to mention bottles and masks. Frankly, I thought they were kind of kitschy, and not my thing. It must have been when I made my first cat, or maybe my first fish, that I realized what fun it could be. And how much practice and skill it actually took. These days, I even take special requests, like the rhino and beagles. I'll find some pictures on the internet so I don't forget something useful, and get to work. Here are a few things I've learned over the years:

All of the beadmaking techniques you have learned can be used to make sculptural beads. The biggest challenge to making these beads is keeping your bead evenly heated, as the bead will not be the same thickness throughout. The designing of sculptural beads is limited only by your imagination.
  • Look at pictures to get a good idea of what you want to make. Pay attention to the details, like basic body shape, poses that are natural for the animal, coloration, etc.
  • You may want to draw the shape of the bead, analyzing the shape of the sculpture using bead shapes you are familiar with, like round beads, cone, or tubes. This will help you with making your first bead and with repeating the form in the future. I have to admit, I rarely do this, but it was pretty helpful in the beginning to break it down on paper.
  • Decide what you will do when. You don't want the smaller details to melt into the large bead while you're working on something else. Pay attention to where your heat is at all times! If I'm making a cat, for instance, I start with the body, and get it well formed before moving on to the head. Once I've got a nice round head attached, I move on to the tail and legs, and finally the smaller details like ears and face. The final step is to pull the tail and legs out a bit and into the position I want, then even out the heat before putting it away in the kiln.
  • Remember to think about the balance of the bead- how will it hang on a cord? The bead will need to have more weight on the bottom if it is to hang upright. If the bead is to be placed on a shelf, it will need to sit evenly.
  • When you are attaching glass to your bead, spot heat the attachment point. Push the glass you are adding gently onto the bead, pull back slightly, then wait for a slight skin to form before pulling the glass into the desired shape and size and burning it off the rod. If you don’t pause before pulling on the rod, you will probably end up with less glass attached than you wanted. You can always build the glass up a bit at a time, or build using dots of glass on top of one another, but this is slower, and therefore more risky. I rarely end up with the right amount of glass the first time, so I'm always adding a bit here and there!
  • Sculptural beads are, by nature, time consuming and therefore subject to breaking. Always remember to reheat often, and keep all the small attachments you add hot- without, of course, melting them into the rest of the bead. Remember that these small parts will cool fastest, so concentrate more of the heat there. Bring them to a slight glow from time to time- just below the point where they will begin to melt and distort.
  • If you are planning on flattening the bead, remember that the glass must be at least as thick on each side as the mandrel you are using.
  • If you are making a large sculptural bead, you may want to use some pre-made parts that you keep warm in the kiln. Think about what kinds of twisties, murrinis, etc. you may need, and make these in advance.
  • It is often useful to use a glass rod to manipulate the glass, rather than a tool. Though this may leave a bit of glass on the bead, there is the advantage that there will be no tool mark to melt out.
  • Heat resistant scissors are a useful tool for sculptural beads. They can be used to pinch, stretch or cut the glass instead of tweezers, which would leave a tool mark. Since all tools pull heat out of the glass, any areas where a tool is used must be reheated.
  • Remember that you can, as with any bead, adjust your torch flame while you work. If you need to melt out tools marks, or spot heat one area of the bead, you may need to reduce your flame to a point temporarily. Remember to return your flame to normal intensity and mix after only a short time, and reheat the whole bead.
  • When you have finished sculpting the bead, slow cool it in the flame, keeping the outside hot while heat from the center dissipates, before putting it in your annealer or vermiculite to cool. Due to the nature of these beads, I would recommend placing them in the kiln immediately rather than using vermiculite or batch annealing later.
I hope these tips are helpful!

Thursday, August 28, 2008

Gelato fish


Well, I just have to show my new style of fish. Not so different than my older fish, after all, but I'm loving my new ultra clear glass. Why gelato? I can't really say- it's just that icy, airy feel that I get when I have the pleasure of eating some really good Italian gelato. And of course the glass is mostly Italian, so it just seems to fit.

Saturday, August 9, 2008

Gone Fishin'!!!!!

I don’t know what it is about glass fish that makes them so appealing. I’ve been making them for years, and they’ve gotten more and more complicated as time has gone by. They are probably the bead I have the most fun making, and are also one of my best sellers. Lucky me!
Why do I enjoy them so much? Hard to say, but the color play is definitely a draw. It’s fun to mess around with the colors and see what happens. It’s also a lot of fun to shape the fins and tail, though it often seems they have little minds of their own! At this point, I make three basic kinds of fish:
Little earring fish, which are the least complicated
Medium fish, which don’t have side fins, and rarely include silver
Large fish which, when I’m thinking, are a bit twisted to give them a real feel of movement, and almost always include some silver foil in the background. I know this make it sound like I have some kind of formula, but the reality is that there are rarely two that are similar, much less alike. And woe be to me if someone wants one like another they’ve seen or have. Because I rarely write down anything I’ve done, it can take me a number of tries to even get close. Recently I wanted to match an earring fish I’d already made- I ended up with another whole pair of earrings, and three others that didn’t quite match, but not the one I wanted. The pair I made sold quickly, so, while I still understood what I would need to do to match the original, I finally made the one I’d started out to make. Now I have a pair of earrings that match a fish I made a couple of weeks ago. Whew!
But the real question for me is why do other people seem to like fish so much? I have one customer who has eight or ten, and another who’s well on her way. They just can’t seem to walk by the table without seeing what’s going on in the fish department. And in my etsy shop, they are far and away my best seller. I talked to another friend, and she said she can’t keep fish in her shop. So what’s that about? Anyway, here are some pictures of a fish being made for your viewing pleasure!

...... .....
Make a cylinder and roll in pre-cut silver foil, Burnish it on, Encase in clear
...........
Add transparent colors, Roll in raku, Shape nicely
At this point, I've changed beads- my gas started running out, so this bit ended up as a silvery pendant. Onward!

.... .
Shape and flatten, Add fins, Tail colors, Side fins too
I add multiple layers of color to the fins and tail, so I kind of go round and round with the colors at this point.

.........
Eyes and mouth added in layers and plunged, Get out those scissors to shape and pull fins and tail, Flame anneal and check everything out. Finito!