Showing posts with label aretsy. Show all posts

Tuesday, June 1, 2010

Under the Sea

Well, I'm just bloggin' 'cause I'm sittin' here waitin' for an answer to an online question. Wanted to show a few underwater creatures, and wonder why folks like fish, turtles, frogs, shells, starfish, mermaids and other things so much. And what other underwater creatures can I make? I did make a squid once- well, twice really, because I didn't like the first one. Anyway, here are a few of my current favs.


Friday, January 22, 2010

Glass Squid

Just a quick blog to show the fun piece I made for my daughter's birthday. She has this thing about squids- don't ask! I've been wanting to make one of these for years, and I finally got brave enough to try. So here it is- Ta-Da!


Wednesday, January 13, 2010

A Quick Pile of Leaves


I have an order for a pile of leaves, and thought I might as well take some pics to show how I do this. A nice, simple shape for the newbies in the bunch! I ended up making a youtube leaf making video- check it out!
Here’s a photo tutorial to make these quick little leaves- they only take about 5 minutes!
1) Make a small base bead- shape ends nicely.
2) Decide which part you want to attach the leaf on, and melt a blob of glass onto that point. Make it kind of globular, not just a flat bit of glass.
3) Add layers of colors around that- I usually do that twice- here I’ve added two lines of clear on each side, then two lines of another green.


4) Dip in one or two colors of frit for some random coloration, or just add some squiggles of this and that.
5) Heat the leaf part of the bead to a nice glow- not completely sloppy, but pretty hot.
6) Get out your leaf press, and press into a rough shape. Try and center the leaf press on the glass before pressing.

7) Use your glass shears to further shape the leaf, and to make some nice deep vein lines.
8) Do the last step again if needed. You can also use your marver or paddle to help shape the leaf into a bit of a cup-like shape instead of having it be flat.
9) Heat the tip of the leaf, touch with a warm (not hot) rod of glass, and pull the tip of the leaf into a point if desired.
10) Pop that baby into the kiln.

The second series of photos shows how to do a leaf without a leaf press. Just follow the above directions, and press with a flat press rather than a leaf-shaped press. I really only use the press for rough shaping- then I like to tweak it a bit, so they all look different.
The leaf press is a wonderful tool for demonstrations- your onlookers get that ‘A-ha’ moment when they see the bead come out of the press. And it’s quite quick, for those with short attention spans!


Monday, November 30, 2009

Shopping Locally


OK, I'm about worn out with all the TV and newspaper ads telling me what I can buy where for what price. So I'm here to tell you some ways you can support your local artisans, shops and community instead of mass merchants. It's easy, it's fun, and you can feel good about your purchases.
Here are a few of the places you might find locally-made, high quality gifts for your loved ones.
1) Your local farmer's market. Ok, I will be writing a separate blog about this sometime soon, but markets in a lot of areas stay open until Christmas. Though many of the farmers no longer have produce for sale, the local artisans and food producers are still hard at work making amazing things, and will be at the market. A few I know of-
*** Baton Rouge, LA. has a wonderful arts market associated with their farmer's market once a month, and in December the artisans are there every Saturday.
*** Little Rock, AR. has a variety of vendors who set up all winter long. You can find lampwork glass ( that's me!), fused glass, jewelry, candles and paintings among other things.
*** Ithaca, N.Y.- yep, believe it or not, many of the regular artisans will put on the old electric socks and sell at this open-air market til Christmas.
So if there is a farmer's market in your area, be sure to check and see if it keeps going into the winter.

2) Local galleries. A somewhat obvious choice, many galleries specialize in local art. And they have more than paintings for your walls. There's jewelry, glass, and loads of other wonderful work for sale. Here in Little Rock, I must recommend Gallery 26. Not just becase I have some work there, but because it's a great place to find interesting, unusual, handmade things.

3) Gift shops. Not sure if your neighborhood gift shop supports local artisans? Call and ask!

4) Museum stores. These can be incredible treasure troves. The Historic Arkansas Museum gift shop, for instance, has all kinds of handmade gifts like soap, candles, pottery, jewelry (yes, mine is there) and woodwork. All of it is locally made, and there is a special section for each artisan- a nice way of showcasing each person.

5) Craft shows. A great way to meet the makers of the items, and find out a bit more about them. Take your time and look around. These can be a bit overwhelming. If you live in Arkansas, don't miss the Arkansas Craft Guild's Christmas Showcase on December 4,5 and 6 at the Statehouse Convention Center.

6) Don't want to leave your house? You can shop locally online easily. Etsy, for instance has a feature called 'shop local'. Just enter your hometown, and etsy will find sellers who live right in your area. Here's a link to that: http://www.etsy.com/shop_local.php

No matter what you might need for the holidays, think local first. Support your local farmers and food producers, local artisans, small local shops, and your local economy, for a more friendly, less frenzied holiday season.

Tuesday, October 13, 2009

Parkview students' first beads


Yesterday was workshop day for me at Parkview High School. Once a year, I have the pleasure of going to the jewelry class and doing a 1 ½ hour introduction to lampwork glass beadmaking. Yesterday there were about 15 students on 7 torches. Wish I had some pictures, but I was too busy to think about that. I hope everyone had a good time, and that some of them will continue practicing on the torches there. P,p,p, as we say.

Here are a few extra tips and reminders.
**Shake the bead release (sludge) well, and dip your mandrels in rather slowly to get a nice even coating. If there is time to let the sludge air dry, that is best, though the mandrels can also be carefully dried in the flame.
**Once your glass has touched the mandrel, it will not come off without breaking the bead release. If you have a sharp or thin end that needs to be evened up, you will need to add glass to that end, or heat it and take it out of the flame and point that end towards the floor and let gravity pull the glass down, or heat and push gently towards the pointy or thin end with your paddle.
**Don’t build your bead too close to the end of the mandrel- leave at least ½ inch of space.
**Don’t ever let your bead get too cool- it can break while you’re working on it if it gets too cool and you put it back into the flame- sometimes explosively. So remember to ‘flash’ your bead through the flame often. If you are working on some little detail, you must remain aware of how long it’s been since you made sure the whole bead was hot.
**Whenever you touch the bead with a tool- like your paddle or trowel- you introduce stress into the glass. Sometimes you can see it as ‘chill marks’ which look kind of like a finger print. Heat the bead a bit after using any tool on it to get rid of this stress.
**If you want to add some little bits that will stick off of the main bead- like fish fins or wings, be sure you heat the attachment point well first.

Here is a quick tutorial to help you with your first beads.

Basic glass bead technique:
1) Begin by heating the tip of your glass rod slowly. There are a couple of ways to do this– you can start heating high in the flame and work your way down into the hotter flame, or you can move the rod in and out of the hotter area of the flame. Either way, keep the rod twisting so that it will heat evenly. Always stay aware of the heat of the rod you are working with and the heat of the bead you are working on (known as “reading the heat base”).
2) When the rod has an orange glow all around the tip, it is ready to stay in the heat of the flame- between the tip of the blue cone of the flame and the area about 1 inch above this cone. Begin to heat the prepared mandrel (in your other hand) to a slight glow while you continue to heat the glass. Rotate the glass rod to avoid sagging, and continue heating until hot glass has a controllable but fairly liquid texture, similar to cold honey.
3) Keep your glass rod in the flame, and the mandrel behind the flame, as you begin to apply glass to the mandrel. The glass rod and the mandrel should be perpendicular to each other- in a ‘T’ position. Roll the mandrel up and away from you during this process. The mandrel will be slightly behind the flame and you will be pushing the rod of glass through the flame to it, heating the glass rod just in front of the area you are actually applying to the mandrel– this gives you a constant source of heated glass to use. TOuch the glass rod to the mandrel, and gently push it on, and begin rotating the mandrel. The glass rod should stay pretty much in one position while you spin the mandrel.
Make sure the glass is good and hot- it should flow easily onto the mandrel. If it feels like it is pulling, pause and let the glass heat up some more, or burn the glass off, heat it again, and then add more. If you are adding more glass to a bead you have started, make sure the bead is a bit cool (not cold) before you add the next layer of glass.
4) Wind the glass once all the way around the mandrel, then move the mandrel slightly to the left and add another wind of glass right next to and touching the first wrap. Add more glass on top of these two wraps, moving the mandrel back and forth as necessary, until the bead looks fairly even, and is about the size you want it to be.
5) When you have applied all of the glass you need, detach the glass rod by pulling up and turning the bead towards yourself, and letting the flame burn it off.
6) Now you can begin to round the bead. Keep turning the mandrel, and keep it horizontal, while you heat your bead in the flame to a nice orange glow. Take it out of the flame, turning it all the while. Look at the bead in cross-section so you can make sure it is uniform all the way around. Use gravity to help round the bead. You may need to gently marver the bead into shape with a paddle. Be sure you don’t push the glass too hard against the mandrel. You are trying to push the glass on the top of the bead into shape, not push the bead around on the mandrel.
7) When you are finished with your bead, you want to cool it slowly (flame anneal) before putting it away. This will help keep it from breaking later. To flame anneal the bead, get it just glowing all around- not so hot that it all starts moving around again- then begin to move it slowly towards the top of the flame, always turning to keep the bead from getting distorted. Flame anneal for 1-2 minutes, or until bead is no longer glowing. Take out of the flame for a few seconds, and then cool in a fiber blanket or vermiculite for 3-4 hours.

Much of working with glass is simply a case of paying attention to the heat base of your glass. Different methods and techniques are most effective when the glass is at slightly different temperatures Stay comfortable, but be aware of what you are doing at all times.

Sunday, September 20, 2009

Do the Math


As you attempt to get your home-based art or craft business off the ground, you may be approached by folks who have shows they would like you to participate in, or shops they want you to sell your products in. Here’s my special tip to help you make these important decisions- do the math! It’s very important to figure out how much something is really going to cost you before you sign on the dotted line and turn over your hard-earned money. What do I mean, how much it’s really going to cost you? Well, first and most important is the booth fee, or percentage the shop will take off the top. Booth fees are pretty straightforward.
Here’s an example. Let’s say I have heard about a show with a $100 booth fee. A fee of $100 is just that, no hidden costs, no percentages. But what, exactly, would I need to sell to make that kind of fee a sensible investment? I have often heard that a booth fee should be no more than 20% of your gross. So if I pay a booth fee of $100, I would want to bring in at least $500.
I would think about the number of hours the show lasts, the amount of inventory I predict I can have in my booth, etc. Does it seem feasible? I have found, in the larger shows I have done, that I can generally sell maybe 20-25% of the stock I have on hand. So for a show like this I would want to have at least $2000 worth of product on hand. I know that can be easily done. Now how about the hours of the show? Well, let’s say the show is just one day- a Saturday from 10am to 8pm. That’s 10 hours. Ok, so if I sold an average of $50 worth of items an hour, I could make that booth fee. Do-able? Well, probably.
There are plenty of other considerations, though. Is it in town? That means no hotel and minimal gas costs. Is it a juried craft show? I find that that is what draws the type of customers I am looking for. Is it indoors or outdoors? Bad weather can ruin your chances of having a good day at an outdoor show. Do I know anyone who has done the show? What do they think? This is a starting point, though folks have different ideas of what a ‘good show’ is.
All of these things and many more should be taken into consideration, but doing the math on that show fee is the first, very important step.
Here’s an example a friend presented me with recently- a craft mall situation where he would pay $100 a month, plus 15% of his sales. Hmmm… That sounded a little iffy to me, so I did the math for him. Here’s what I told him. Well, if you sold $1000 worth of your product a month, you would pay that $100 rent, plus another $150 a month in fees. That’s 25% of your sales. Is that sensible for you? Well, he knew from previous shop experiences that it was pretty unlikely that he would sell $1000 worth of product in one shop in a month. And if he sold less, the percentage he would be paying the shop would just go up. For me, the answer was a definite no. I don’t think he’s going to do it either.
Yes, there may be times when you just want to take the plunge, roll the dice, and see what happens. But I’d strongly suggest that you first do the math, and not delude yourself about how things will turn out financially in the end.
Hope this helps with some of those difficult show decisions!

Sunday, August 30, 2009

In defense of the hothead


I wanted to share a bit of information and opinion on the hothead torch, which is what I use. And what, you might ask, does that mean? And furthermore, who cares? Well folks making lampwork beads care- a lot in some cases- about what kind of torch a person uses. I am not a victim of 'torch envy' (thanks for that phrase to Corinna Tettinger). I am more a believer in 'what can I afford?' and 'what works for me?' So here is my explanation of what it is, and why I use it.
A hothead is about the lowest end torch one can effectively make glass beads with. It runs on a single fuel (I use propylene) rather than propane and oxygen. It has a rather bushy (wide) flame, and doesn't get quite as hot as a dual-fuel torch does. The flame cannot be made into a pinpoint, but it can be adjusted somewhat, especially if you are using a large fuel tank rather than those screw-on, ecologically wasteful, little bottles you can get at the hardware store. I use a large tank, and it makes an enormous difference in the heat and adjust-ability of the flame. So I definitely recommend using a larger fuel tank with a hose going to the torch.

Many people say they cannot work with this type of torch, but, frankly, a lot of them have never tried, or never tried very hard. Not that they should- they have better, nicer torches at home, and this does work a bit differently. I have even heard this referred to as not a 'real' torch. I have used this type of torch for about nineteen years, so yes, it works, it's real ( I have the burn marks to prove it!) and yes, you can do a lot with it- it just takes practice, as does using any torch.

The hothead does not get as hot as dual-fuel torches, so many folks think it is slower, but I am not really convinced of that. I have asked other beadmakers about how long it takes them to make a particular bead, and my times are usually equal to or even quicker than theirs. The first melt and wrap may go more quickly, but detail work takes time, no matter what torch you're using. And many new beadmakers have problems because their torch is turned up too high. I rarely have that problem. And, believe it or not, I actually don't usually work with my torch turned all the way up.

The hothead is an inexpensive torch- under $65, whereas dual-fuel torches start at about $170. Not really a huge difference, but there are a number of other costs that add up, the largest one being oxygen. You either have to buy a tank and transport it (which I don't want to do), or buy an oxygen concentrator, which can run quite a lot. Over the years, a dual-fuel torch might end up being less expensive, I suppose. That's some math I haven't ever done.

Lastly, I'm used to this type of torch. Yes, I can use dual-fuel torches (though I still prefer to have someone there to tell me if I have the flame right), but I'm most comfortable on my little hothead.

The one thing I don't like about my torch is that it is pretty loud. Makes listening to music hard, but not impossible. And I can't really hear the phone ring- that might be a good thing! I know I will 'upgrade' one day, but in the meantime, I am happy with my hothead.


Thursday, July 30, 2009

Lampwork Glass Butterflies for Beads of Courage


Well, as things often go, about the time I decided to stop making butterflies to sell, I needed to show a few folks how I make them for the Beads of Courage program. Here’s some more info about the program: http://www.beadsofcourage.net/
Arkansas Children’s Hospital is one of the many hospitals that use this program for children who are undergoing hospitalization and treatment. It’s a little bit of fun for the kids to look forward to at the end of some pretty intense treatments. The (as yet unnamed) bead group that I meet with once a month or so decided to make some beads to donate.

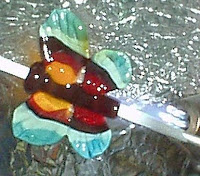
Grace's Butterfly........Debby's Butterfly
Our little three hour session wasn’t really long enough, so we’ve all gone home with a bit of homework: Make some beads to be donated, and we’ll ship them off next time.
After writing this whole crazy mess down, I have to say, for simple and elegant directions, you can go look at the ones Sharon Peters wrote here: http://www.beadsofcourage.net/art/ButterflyTutorial.pdf And then tweak it your own way!
Here's a tutorial for making butterflies the way I do it to go along with the youtube video that actually shows me doing it- see link above (thanks to Vicki of parrotise beads).

NOTE: You are responsible for your safety. Please follow all recommended guidelines for studio ventilation, face mask use, safe use of enamels, and other safety precautions. This tutorial presumes a basic understanding of lampwork bead making techniques.

......Finished!
Here’s a tutorial for making butterflies my way, as can be seen in the video:

First, let me say I had a few problems making the body- my glass had a lot of bubbles in it, and I had to pop them and work them out. So the video actually starts about 5 minutes into the session. I had some problems at the end too, so the video ends before I really finished the butterfly- I got a bit obsessive about the shape. In the end, I just had to let the wings be a little different from each other.

1) Make a tube for the body- about 1 1/8 inches long and ¼ inch in circumference is good. It will need to be a little fatter if you are using a larger mandrel. I often just make a clear body, as I want the wings to be the main focus.
2) Marver into a nice even tube and taper the lower end a just little bit.
3) At one end of the tube, add a bit more glass for the head. A couple of wraps around should do it. Melt down to a nice even shape. Make both ends of the body nice and even and a bit dimpled at this point, as you won’t have much of a chance to do it later.
4) Now it’s time to build the wings. I build them fairly flat, and add quite a few colors. My preference is to make them mostly transparent. To me that’s part of the butterfly look- ephemeral. So, start with the transparent color of your choice and stripe it along the upper 2/3 or so of the body. Make sure the body is fairly hot when you add that first swipe, so that you have a nice attachment between the wings and the body.

The body.......................the head............begin the wings

5) Pick up your next rod and make a swipe or two all the way around the first one.
6) Choose the color you’d like to use first on your lower wings and swipe that on the bottom third of the body. You can use the second color from the top as the first color on the lower wings if you like. Again, be sure you have a nice attachment on this first swipe. Try and push that first swipe up so that it actually touches the upper wings.
7) Add another color to the lower wings. By this time you will (hopefully) have ¼-1/2 inch of glass sticking out from the body on both sides. It already looks a bit like wings. Flatten with your mashers. If it’s all kind of blobbed together, don’t worry too much, we can take care of that in a minute.

another color.........begin lower wings.....ready to flatten

8) If your top and bottom wings aren’t touching each other, now’s the time to fix that. This part’s a bit hard to explain. Heat one of the bottom wings, grab it between the mashers of your choice, and push the top of it towards the top wing while rotating it down. Do the same thing on the other side. If you have watched the video, you can see my hands waving around kind of wildly after I’ve moved the wings around- it’s not part of the bead-making process, or some kind of strange tic- I’m showing the gals an exaggerated example of the motion I just used to move the glass around. It’s more or less drawing a backwards “J” while I have the glass between the mashers.
9) With any luck, you’ll now have the wings pushed together in the middle. If not, you may have to do a little bit of the grab and push with the top wings. All you’re trying to accomplish is to get a little bit of the wings melted together in the center. Why? To make it less fragile in that area. If you have melted them together too much, superheat that area and snip it apart a bit with your scissors, then melt to round off the edges.


Flattening..................flattened.................more colors
10) Add more colors top and bottom, dipping in a little raku frit or enamel along the way if you like. Try and make each set of wings about the same size and shape, with the top wings about twice the size of the bottom ones.
11) Decorate as you like, adding layered dots, bits of color here or there, or what have you.


Adding frit.....enamel............clear and dots
12) Now it’s time for the final shape. For this part I use scissors. Superheat one of the wings. Take it out of the flame and grab with your scissors. Pull a little bit to indent and shape, move and do it again- about four times for the bottom wings and six or so at the top. It may help to have a picture or two of butterflies that you can look at to help you see what shape you are aiming for. Normally I will heat one of the top wings, grab it close to the center on the bottom and indent and shape it, move and do it two or three more times, then reheat and tackle the top half of the same wing. You’ve got to remember what motion you did and do it about the same on the other side. Try not to cut all the way through with the scissors, although that can make a nice effect on the edges as long as you melt and round it out a bit afterwards.

More dots...............first wing shaping...second wing shaping

13) If the wings are not quite to your liking, you can shape them further by heating the wings and a glass rod or stringer, attaching the stringer to the tips of the wings, and pulling gently. The wings should be fairly hot, and the stringer or rod just hot enough so it will stick temporarily to the wing tip. Melt off and reheat a little to make sure you haven’t made a sharp place on the wing.
14) And now for the feelers- if you want to add them, though this may be the deal breaker after all the work you’ve put into this baby! If you are brave enough, dot some antenna onto the top of the head. You can build up a series of small-ish dots, or try dotting and pulling the glass a bit to make them. Don’t make them too long and fragile, and be sure to bend them a little bit away from them mandrel so you can still get in there with your tools to bail it.


Top wings done...shape bottom.........antenna

Whew! That’s a lot of instructions! I was lucky with the butterfly I made for this tutorial- the photos just about took themselves.