Friday, December 14, 2018

Paypal 'shipnow' link

Here's the paypal 'shipnow' link (though it looks like they've renamed it). I'm putting it up here because I'm tired of having to look around the web and find it each and every time I need it!

 If you've got a paypal account and want to ship something to someone through paypal that wasn't a purchase, this is what you use! Just click on the link below, sign in to your paypal account and you'll be ready to ship stuff using your paypal funds.


https://www.paypal.com/us/cgi-bin/webscr?cmd=_ship-now

I found it here, so you can thank Goosie Girl!

Sunday, November 18, 2018

Using Enamels in Lampwork Beads


Here’s a rundown of the enamels I use for making lampwork glass beads, such as it is. I don’t actually use all that many colors. I have tried a few others, but these are the ones I’ve settled on. 
I like enamels because they give nice, clean colors with none of the problems you can run into with glass rods. No devit, no mud, no worries! I also find them essential when I’m trying to duplicate most types of designs from nature~ I always use them as part of my seahorse patterning. I wrote a blog about an experimental bead of that sort a while ago, trying to imitate a natural pattern. My camera ran out of gas in the middle of the experiment, so there are no pics of the best part, but you can get an idea of what was done, anyway.  
By the way, I don't care how many people say to do it, I DO NOT recommend putting your enamel in a shaker or sifting it onto your beads. Talk about some airborne micro particles that you can breathe! Ugh! 

Here are links to a few articles on this blog that talk about enamel use.


I’m still not really sure about the edp trick, but it’s worth further exploration. 

Here are the colors I use, and why!

*  White(9010)- essential~it’s great for a background and can make the colors pop. And there are other things you can do with it too, like overmelt goldstone frit into it for an interesting stone like look (there’s a little more to it than that, but not much. I need to find my old notes as I haven’t done this in years.)
*  Bright red (9840)~ great for a nice, stable red red. If folks ask me for something red and I am thinking clearly, I virtually always use red enamel.
*  ‘New’ purple #9740~ a nice, clean purple. Dark purple is OK, but this reads more true to me.
*  Light or dark orchid(9760 or 9780)~ wonderful pink either way~ also essential. I don’t know if I can tell one from the other. Reacts nicely with raku and iris gold frit.Also lovely with a line of rubino running through it.
*  Oxford blue (9650). There are several blues that are all very similar. Medium blue or blue green are OK, but I prefer oxford. There is also something called just 'aqua' I think which is quite nice.
*  Transparent aqua( might be #9452)~the only transparent I really want to have around. It’s a nice light aqua blue, not dark like all of the ones mentioned above. Probably best backed with white enamel.
*  Melon yellow (9830)~ kind of halfway between orange and yellow. I’m not a big yellow fan, but I do like this color.
*  Green~ I’m pretty sure it’s apple green (9330) that I like. Moss is a bit too grey and dark for my taste.

I have not tried orange red (9835) but it looks intriguing.
NOT black. I’ve gotten it and it just seems to turns kind of dark grey and takes over. Then again, maybe some folks know what to do with it!

Monday, October 29, 2018

Free Shipping~ Or Not


What’s so free about free shipping?! Recently, etsy has been having a sweepstakes with a big prize and all you have to do to be registered in the drawing is to have free shipping in your shop over the holidays. Huh! Apparently this is something that customers actually prefer to, say, a 10% off sale. It is also something that I can’t get my head around. My shop motto should be something like ‘fair and sensible pricing on everything all the time.’ Because that’s what I try to do. 

So how about this free shipping thing? Why not do it? Well, frankly, I can’t see how it would not cost my customers more, in some cases much more, than just charging a fair shipping price. Why? Because I do have to pay for shipping. In order to offer ‘free’ shipping to my customers, I’d simply have to add it to the cost of each item up front. To be truly fair about it, I’d have to go through all of my etsy sales and see the average number of items in a single order and then, being some kind of a math genius, figure out from there exactly how much I would need to add to the cost of each item. What a pain! But let’s pretend I feel like doing that. Let’s see if I can lay it all out.

Right now, I charge shipping for the first item and the rest are gratis. The reason is that it doesn’t really cost me much to add another item to a box. And if someone buys a bunch of things, well, I’m happy to eat the additional cost and sometimes even upgrade to priority mail. 

So today, if you buy 10 beads in my shop, you pay $3.50 in shipping within the US.

Let’s say I offer ‘free’ shipping and have done the calculations and found that the average person buys 2 items at a time. Generously, I will add only $1.75 to the price of each item to cover shipping costs. Now let’s say you are a wonderful customer and buy 10 items at once. Well, because I’ve added $1.75 to each item, you’ve just paid a whopping $17.50 in shipping, instead of $3.50. That’s $14 extra dollars, in case you weren’t paying attention.

The other side of this is that if I did offer free shipping, folks might simply purchase one thing at a time, costing me both extra time and money. I feel that what I am doing now is fairest for everyone.

Now, here’s what my current shipping charge covers, just in case you’re wondering. Postage of $2.66 (if I can ship from home~ if not the postage is the entire $3.50), an envelope, which usually costs .50, a touch of tissue, bubble wrap and tape so we’ll add .10 there, and another .05 for a business card and a note for a whopping total of $3.31. So I get paid about .19 for making the box, packing and walking to the mail box~ just like in olden times… Oh wait! Now that etsy is taking 6% (or something) of shipping charges, I actually get nothing for packing it up and sending it off. Ah well.


Sunday, October 7, 2018

Lampwork Glass Bead Tutorials~ Sculptural Techniques

Over the years, I have sent a lot of tutorials in to magazines to be published, often at their request. I've decided to try fixing up a few of them to be sold on etsy- new and revised by me! Why bother? Because I feel I can make the tutorials even better myself! How?
  • I get to edit the photos myself. Often they come out cleaner and crisper when I do the work. 
  • I can add tips and extra information that there was no room for in the magazines.
  • I can include extra photos.
  • At the end I add a one-page list of all the steps for easy reference.
  • I can add a picture of my beloved pup if I want to!
Because these are PPTs (previously published tutorials), they are only $5 each and will be bundled for extra savings too. The location of the original publication will be noted in the etsy listings so if you already have it, you don't need to buy it again.


I've begun with a couple of sculptural tutorials- a Dragon's Head (Dragalope) bead and a Fish Bottle Bead. These are beads that only I make, so the instructions are all from my wee brain. I feel they give a lot of information that is especially nice for folks who want to try their hands at sculptural beads. Find all of my tutorials here: Glassbead tutorials on etsy

Mask and turtle instructions should be available shortly. These tuts have been published in a variety of places- The Flow, Soda Lime Times, Glass Bead Evolution and Glass Line to name a few. I thought it would be nice to have them all in one place!

Tuesday, July 31, 2018

The Glass Leaf Project- Blowing in the Wind

Over the years (many) I have made a LOT of lampwork glass leaves. They are pretty quick and can be a good way to try out new colors and combinations. When someone buys something online, they are likely to get a lagniappe 'lucky' leaf included (unless I've temporarily run out).

When I went to a family reunion, I made a bunch- leaves off the family tree- to give away. When I left, I forgot the leftovers in the rental car (my silly family was reticent to take more than one each). The company was kind enough to let me know and I told them to just keep them and distribute them. They probably pitched them.

Lately I've been wondering- what happens to all those leaves? Do they get used? Worn? Given away? Put away in a dusty drawer somewhere for 'future use'? Tossed in the trash (hopefully not)? I decided it was time I tossed out some ideas of what to do with those wee leaves, so I am officially starting the 'glass leaf project' in hopes that these leaves will slowly make their way out into the world. The first leaf that officially became a part of this project was given to a well known lampworker~ he wanted to return it, but I insisted that, if he didn't want to keep the leaf, he could begin this project. So the first project leaf (in picture at right) may be somewhere out there already.

If you have a glass leaf that I made, you have just become an unwitting participant in this project. You may participate by leaving your leaf gathering dust in a drawer if that is your choice! But here are some other ideas:
* Wear it~ just put it on a cord and voila! There, that was easy
* Make something out of it- OK, that's why it's sitting in a drawer, right? Too hard!
* Give it to someone else to wear- someone who you love, someone who needs a bit of cheering up, a stranger on the street, whoever you like. No strings attached (well, you might want to put it on a cord for them).
* Put it somewhere and let someone randomly find it. Maybe with a little note that says 'take me'.
* Toss it in the drink. That's right, toss it in the nearest body of water for archaeologists of the future to find. A bajillion years from now, these wee leaves could be found all over the world~ that's a fun thought. I have tossed a lot of seconds and failed beads into bodies of water along my travels~ ponds, lakes, rivers, streams, the Gulf of Mexico~ so this part of the project is already in motion.

I do hope some of you will not only participate, but also let me know where your leaf ended up~ with a picture if you like! I don't know how to do this kind of stuff, so I will direct you to a post on my facebook fan page where you can comment and share pics if desired. Or you can post pics on my personal page!


Wednesday, June 13, 2018

Caution, Beads May Contain... Wanderings of a Torch Addled Mind


For the time being, I am making beads in a garage- with the door open. This, of course, means that there is wind, so things blow in.  There's also the possibility of bugs flying around (and they do!), as well as chipmunks wandering through. A couple of days ago, I pulled a mandrel out of the mandrel holder and managed to sling dirt across the table- right into some enamel. Not wanting to toss it, I scraped out most of the dirt and used the remaining enamel up on a couple of leaves (leaves are my give-away lagniappe beads for online orders).


Then, yesterday, I noticed that it is cottonwood season. I can't imagine that one or two of those babies didn't find their way into a couple of beads. I mean, they were flying all around!

So, my archaeological friends, does this mean those beads can now be traced right back to where I am now, just like in the high tech crime shows, or is it likely that it was all burned out? Do I need to put a note up in my etsy shop? Here's what it might say:

CAUTION: Beads may contain dirt, cottonwood, hair or other unknown objects

Sunday, April 29, 2018

Around town~ a day out in Ithaca

I live (for the moment) sort of on the outskirts of a rather popular little left wing town in upstate NY. Things are happening here all day every day, most of which I ignore. Feeling a bit housebound, what with winter stretching to its sixth month, I went walk about the other day- down to the two block long pedestrian mall downtown called 'The Commons'. A few of my findings follow.

 Seems like every time I walk past this wee table, someone is sharing it with the bronze gal in residence. Often they are seen talking to her or sharing a cup of joe. This woman was enjoying a chat on her mobile phone as the 'Child of Ithaca' or 'Citizen of the World' looked on.The statue is of a young local woman who died an untimely death.
 Ithaca thinks of itself as an artsy community. There are at least five shops within a two block radius that sell handmade artisan works. Four of those really concentrate on local things (Ithacamade carries a few of my beads, earrings felted bowls and scarves).

The photos I took into windows also show some of the less exciting bits of the Commons in reflection- there are some rather blocky, boring concrete structures as well as new huge buildings popping up. It's all part of the sadly necessary expansion that is happening here due to the fact that it is such a very popular place to live. That despite the weather, which is downright dreary a lot of the time- so much so that a popular local band wrote a song called 'I Live Where it's Grey' which encompasses well the feeling of a long wintry day.

Here's another shop window reflection shot. How did those half-head props become popular? A bit spooky if you ask me!

I always want to look at these types of photos carefully and see if there are reflections of reflections involved. I loved those 'through the looking glass' pictures when I was a kid. It's  called the Droste effect.  These photos are different from those types of pictures, but there can be an element of surprise involved~  ghosts of people walking and other oddities.
Last but not least is the statue of a bubble blower? I suppose that's what this guy is doing, though to me it looks like he's blowing a bit of glass (of course).

That's today's tour of a wee bit of downtown Ithaca '10 square miles surrounded by reality' (or so they say). I find Ithaca all too real- more on that later, I'm sure!

Thursday, April 5, 2018

Lampwork Masked Bead Tutorial From Isinglass Design


https://www.etsy.com/listing/501695668/a-beginner-and-intermediate-tutorial?ref=shop_home_active_16
Here is an example of how to make one style of  masked beads in photos, taken from my ebook 'Reflections: the Diary of a Glass Beadmaker.' Complete instructions for these, two other masked beads styles and many other lampwork glass beads are in the book, available on etsy.


Black base bead
Aqua dots


Black dots overlapping aqua
Black Dots Top & Bottom


Black dots between
Melt it all in evenly

Melt everything together, fin~

Aqua dots as shown


Here are a couple of other masking designs that are covered in the book.


Friday, March 23, 2018

ROC Day Felting Mini Workshop

ROC day 2018 with the Black Sheep Handspinners Guild was a wonderfully fun experience here in Lansing, NY. It had to be put off for a couple of months due to the snowy winter weather, it was shorter than expected, but we managed to cram in loads of stuff! I was responsible for a quick little intro to felting workshop~ we tossed some fun bits of wool and things on a pre-felted surface, sprayed it with soapy water, rolled it up and started the felting process. After I took it home, I went to town and got it all felted together. Here I'm going to share photos of what I did and the results. The finished piece has been entrusted to another spinner who will, hopefully, show it off at the April meeting.

Up to the left is the piece after it was wrapped in a towel around a pool noodle and rolled about 100 times in each direction, top and bottom.

On the right, you can see how the piece has shrunk more on the far end than the closer end. At this point, the far end had been rubbed between my hands a number of times, until I could see and feel the felting happening.

Here are closeups of some of the bits and pieces. You can see that the locks were having a little trouble sticking on and the silk needed a little extra wool tossed over it so it would stay down nicely. A little more rolling and rubbing was done to get these bits to stick down better.

Once that step was completed, I decided to do a bit of cutting and pre-shaping. Slits were cut all along one side, while the other side was pulled into a kind of scalloped edge. The ends were pulled and rubbed between my hands into a rather random shape.

Once it all looked like it was going to stick and I could see a little shrinkage occurring, it was time for fulling to begin. I took it to the sink, ran warm water over it, added a little soap, squeezed it out and then tossed it against my steel sink about 100 times. It was put in a bath of cold water with some vinegar added to neutralize the soap, rung out again, and then thrown another 50 times or so. Now it was really shrinking up~ hooray!

 You can see on the left how the slits expanded into larger openings and the piece of silk took on some bumpy texture as the wool around and over it shrank. Another rinse in really hot water (off the stove), some rubbing and pulling into shape, and then a final rinse in cold water and it was ready to dry out.

It was wrapped in a towel and gently mashed to get some of the water out, then put in the dryer for about 1/2 hour. As it was still a little damp, some last minute shaping was done and then it was hung to finish drying.

On the right is the finished piece with the side we were working on at ROC day up.

To the left is the back side of the piece- see how easy it is to make it reversible?


You can keep up with the Black Sheep on facebook!


National Button Week 2018

 Well, I'm late to the party as usual~ it's now close to the end of National Button Week, 2018! Yup, it's a thing- who knew? It was begun in 1989 by the National Button Society and occurs in the third week of March. This year, it is from March 18-25. In honor of this, I have put my lampwork glass buttons on off 25% sale for the remainder of the week. Find them all here!

For more about glass buttons and some links to interesting button stuff, check out my earlier blog 'The Technology of a Glass Button'.

Wednesday, March 14, 2018

Product Review- Bead Buddy 1 Step Ear Wire Maker

I went to the local crafty store the other day and saw an ear wire maker on clearance. I figured $13 wasn't too much to spend for something that could make my life a wee bit easier. I'm here to tell you what I think!

In general, I like it- the directions are simple and it's easy to use. It says it can be used for 20, 22 and 24 gauge wire and works well with the 20 gauge sterling silver wire I use. Since I paid just a pittance for it, I'm happy. This makes simple, basic wires, which I do use for a lot of my earrings. Here's a youtube video showing how to use this tool. And now for my list of the good and bad.

  • Easy to follow directions. 
  • Works for the 20 gauge sterling wire I use.
  • Tends to pop out of the contraption. Hold in  gently at the tail end.
  • Loop for bead is not round, it is more teardrop shaped. The picture on the package shows a nice round loop, but I have not been able to achieve that. 
  • To make loop rounder (instead of teardrop shaped), wire should not be pushed all the way to the end of the tool.
  • Wire can be cut to the suggested 2 inch size, or use a long piece of wire and cut to length after it is shaped. If wire is cut to 2 inches, the 'tail' at the back end is rather longer than I like. If cut afterwards, there is little wire waste.
  • Wire is a little hard to remove- placing a fingernail under it as shown in their instructions is pretty well essential.
  •  There are a lot of moving parts- we'll see how long it lasts!
Be sure and file both ends of your wire- the loop end just to remove burrs, but the end that goes through the ears needs to be finished very smoothly.

Here's how the look compares to a commercial ear wire- I like the fact that these wires are longer in the back to help counterweight the heavier glass beads and make it stay in the ear better.


Thursday, February 15, 2018

Making Felted Woolen Purses on the Inside

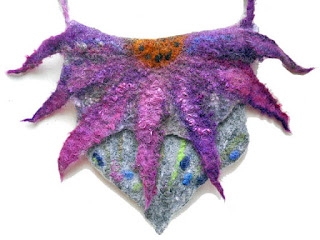
Wet felted handmade felted purse with flower flap from Isinglass DesignWell, for the fiber fans in the crowd, I wanted to pop in and talk just a little bit about making felted fiber purses. A purse was among the first things I was inspired to make with felt. After a quick lesson in making batts, I came home and thought- well, that looks like it would make a nice purse~ so I did!

One part of the instructions I modified right away to make the whole thing around a resist and then cut the resist out. I made a resist only for the 'business half' of the purse and made the flap sticking up from that on its own.  Once it was pre-felted, the top of the front opening was folded under a little so that it would not stick to the back half of the purse. It is probably not quite as even as a cut would be, but I enjoy the organic look and find the felt edge can usually be pulled into shape while wet so it is fairly even.
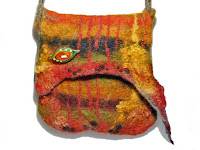
Orange wet felted purse https://www.etsy.com/listing/569158626/orange-green-earthy-felted-wool-small?
After the purse was finished, I painstakingly lined it by hand as I have no sewing machine. That was WAY too much work, in my opinion. In the next phase, I simply felted things down a bit more and made sure the purses were sturdy enough not to need a lining at all. But then I thought wee fibers might get into things. I admit that I don't wear lipstick, but I imagine it is not where one would like their fiber to end up.

A couple of weeks ago, I had an inspiration - why not nuno the inside with some fabric I had lying about? Then there'd be a mostly fabric inside without all the trouble of hand lining it~ to my shock, this actually worked! At first, I made the fabric into nuno pre-felt, let it dry and cut it to shape, leaving some room along the seams so the fibers could felt together nice and strongly. After doing it this way a couple of times, I tried it without making the nuno pre-felt~ just adding a cut piece of fabric to the inside~ which also worked, but the fabric did want to slide around a bit.

To make the nuno prefelt, simply take a piece of loosely woven fabric, add a thin layer of fiber, get it a little wet and soapy and roll about 300 times, just until it's all stuck together and the fibers are poking through the fabric a little. Let it dry flat and cut it to the size and shape needed. The fabric part should go to the inside of the purse, with the fiber side up so that when new fibers are added they will all mesh together well.

That's it for now!

Saturday, February 10, 2018

How to Get Clean, Clear Holes in your Lampwork Beads


Isinglass Desgin handmade glass fish bead https://www.etsy.com/listing/593000089/purple-glass-bead-fish-pendant-necklace?
Here it is, the post you've all been waiting for, where I reveal how to get really clean bead holes! Woohoo!

Once a lampwork bead is finished and taken off the steel mandrel, the sludge inside has to be removed. Folks use a reamer of some type to do this- sometimes by hand, sometimes with a dremel tool. But no matter how it's cleaned, the inside of the bead hole can look pretty gritty and almost chalky at the end of the process.
Fish hole before sanding
In a small holed bead with a solid core, this might not be a really big deal- who can see down in there anyway? But if your bead is clear or the hole is large enough that someone might be looking at it closely, it can be an issue.
Fish hole after sanding

So, what can you do about it??? One solution is to sand the inside of the beads. Here's how.

First ream the bead well and make sure all of the sludge is removed. This can be done by using diamond reamers by hand or with a dremel tool. Make sure the bead and tool are both wet when you do this.

Reamer with sandpaper
Take a tiny rectangular piece of 400 grit wet/dry sandpaper, place the long reamer (or mandrel) in the center lengthwise and fold tightly around it. Get the bead and sandpaper/reamer wet and rub back and forth lengthwise all around the hole for a minute or so. It could take a little longer if the bead is really messy inside. If that is the case, you may want to start with 220 grit wet/dry sandpaper.
Next do the same with a piece of 600 grit sandpaper. That should do it for the inside of the bead. If you would like it to be even smoother, go up to 1500 grit wet/dry sandpaper.

End reamers with sandpaper
If you want to sand the opening of the hole, take a small square of 400 grit sandpaper and place it at the tip of a small conical reamer. Rotate until smooth, then do the same with 600 grit.

At the end of this process, your bead will have a lovely smooth satin finish.


A couple of final tips ~
Use the smoothest sludge you can find to start with. For my money, that's KRAG Mudd. You will need to call them to order it. Yes, it is kind of pricey (mostly because of the shipping cost). But it will give you a decent inside surface to start with.
Air dry your sludge over night. This will also help the sludge stay strong while you work on the bead.
Black bead before sandpaper
Black bead after sandpaper
Clear bead before sandpaper
Clear bead after sandpaper