
This is not to be a blog on how to price your work. If you're looking for that, check out Laura Bracken's
jewelry and craft pricing calculator.
What I wanted to talk about here is a bit about the vagaries of pricing artisan handmade work. Yes, you need to take your supply cost and time into
account. Also all the training you've done to get to where you are
today. But there are other elements that can come into play. I think of it as the 'because I say so' factor. I have jokingly said this to customers from time to time (if I think
they will understand that it IS a joke), but there is a big element of truth involved in that statement. Only I understand exactly how a particular bead was made and what it took to do it. There are pieces I love because I am so happy with the success of the technique involved. But the customer has no clue about that. If you meet me in person at a market or show, I am likely to try and encapsulate the technique used that I am so delighted with. But as a customer, you'd probably have no clue what I was talking about. Most folks smile and nod~ their take away is probably something like 'well the artisan is pretty excited about that piece, so there must be something special about it.' ( I hope they're not thinking- 'well SHE'S certainly proud of herself!).

Does size matter? Well, in
perceived value, it probably does, but in reality, size is not the main determining factor in my own price structure. If you look at my
etsy shop you will see that most pieces of the same type are pretty close to each other in price. Even though there are some pieces that I am really happy with and some that I feel are more average, I determine a basic price for the type of item and then stay within that range. The base price is pretty much a result of the time I normally spend making a piece of that type. Some pieces take a little less time, some considerably more, but time is not the only thing that makes a piece more or less valuable to me. And since I'm the one making the decisions around here, the prices I determine on are the ones I'll use. Why not charge more for the pieces I like better? Well, as my mom used to say 'it all comes out in the wash.' It is true that, just because I like something, that doesn't mean it will be a customer favorite. And just because I am not impressed with something else doesn't mean it is inferior. Again, perceived value comes into play. What the customer likes will seem more valuable to them than the pieces that didn't catch their eye, regardless of what I tell them. I would never say- 'oh I hate that piece, you should get this one instead, it's nicer!'- regardless of what I might be thinking!

Prices for each type of item will rise over the years as I feel that the pieces in general are nicer, larger or more complicated and therefore worth a bit more. One other thing that I am aware of is what I perceive as the value of the item. If I were out shopping, how much would I be willing to pay for something like I make? What would I think of as a reasonable price? I want my work to be affordable. Maybe something you wouldn't buy every day, but something you're not kicking yourself about buying later because of the price. In the spirit of keeping the joy of owning a wee bit of an artisan's work alive, I'd like customers to remain happy with their purchase on all levels. It is also a reason that I am not a 'hard seller'. If you like something, can afford it and want to take it home with you, then I am on board and happy to help you out! If you want to just stop and chat and look, that's good too. I have gotten so many ideas and suggestions from window shoppers and customers alike~ I consider getting out of my box a bonus to setting up for in person shows.

I am a 'bail as you go' bead seller. When I am at my table, I have a few pieces bailed and ready to roll and a lot that can be fixed up on demand. It is true that folks tend to buy the bailed pieces first (so I probably should have more of them ready to roll). I can sit at my table and do a few more throughout the day, which often brings folks by to see what I'm up to. I've also had folks who want to watch the bailing process- a mini class if you will. I'm just fine with giving out some pointers. If they're serious about it, they may learn a little something.
Here's a little pricing trick I use at my table when selling in person. I use signs that show a range of prices rather than pricing each item individually. After years of hearing folks say 'oh it figures I would choose the most expensive one' I have made my price signs so the highest possible price is a little more than the most expensive piece on the table. Silly? Yes, but I'm much happier not having to hear folks say that so often.




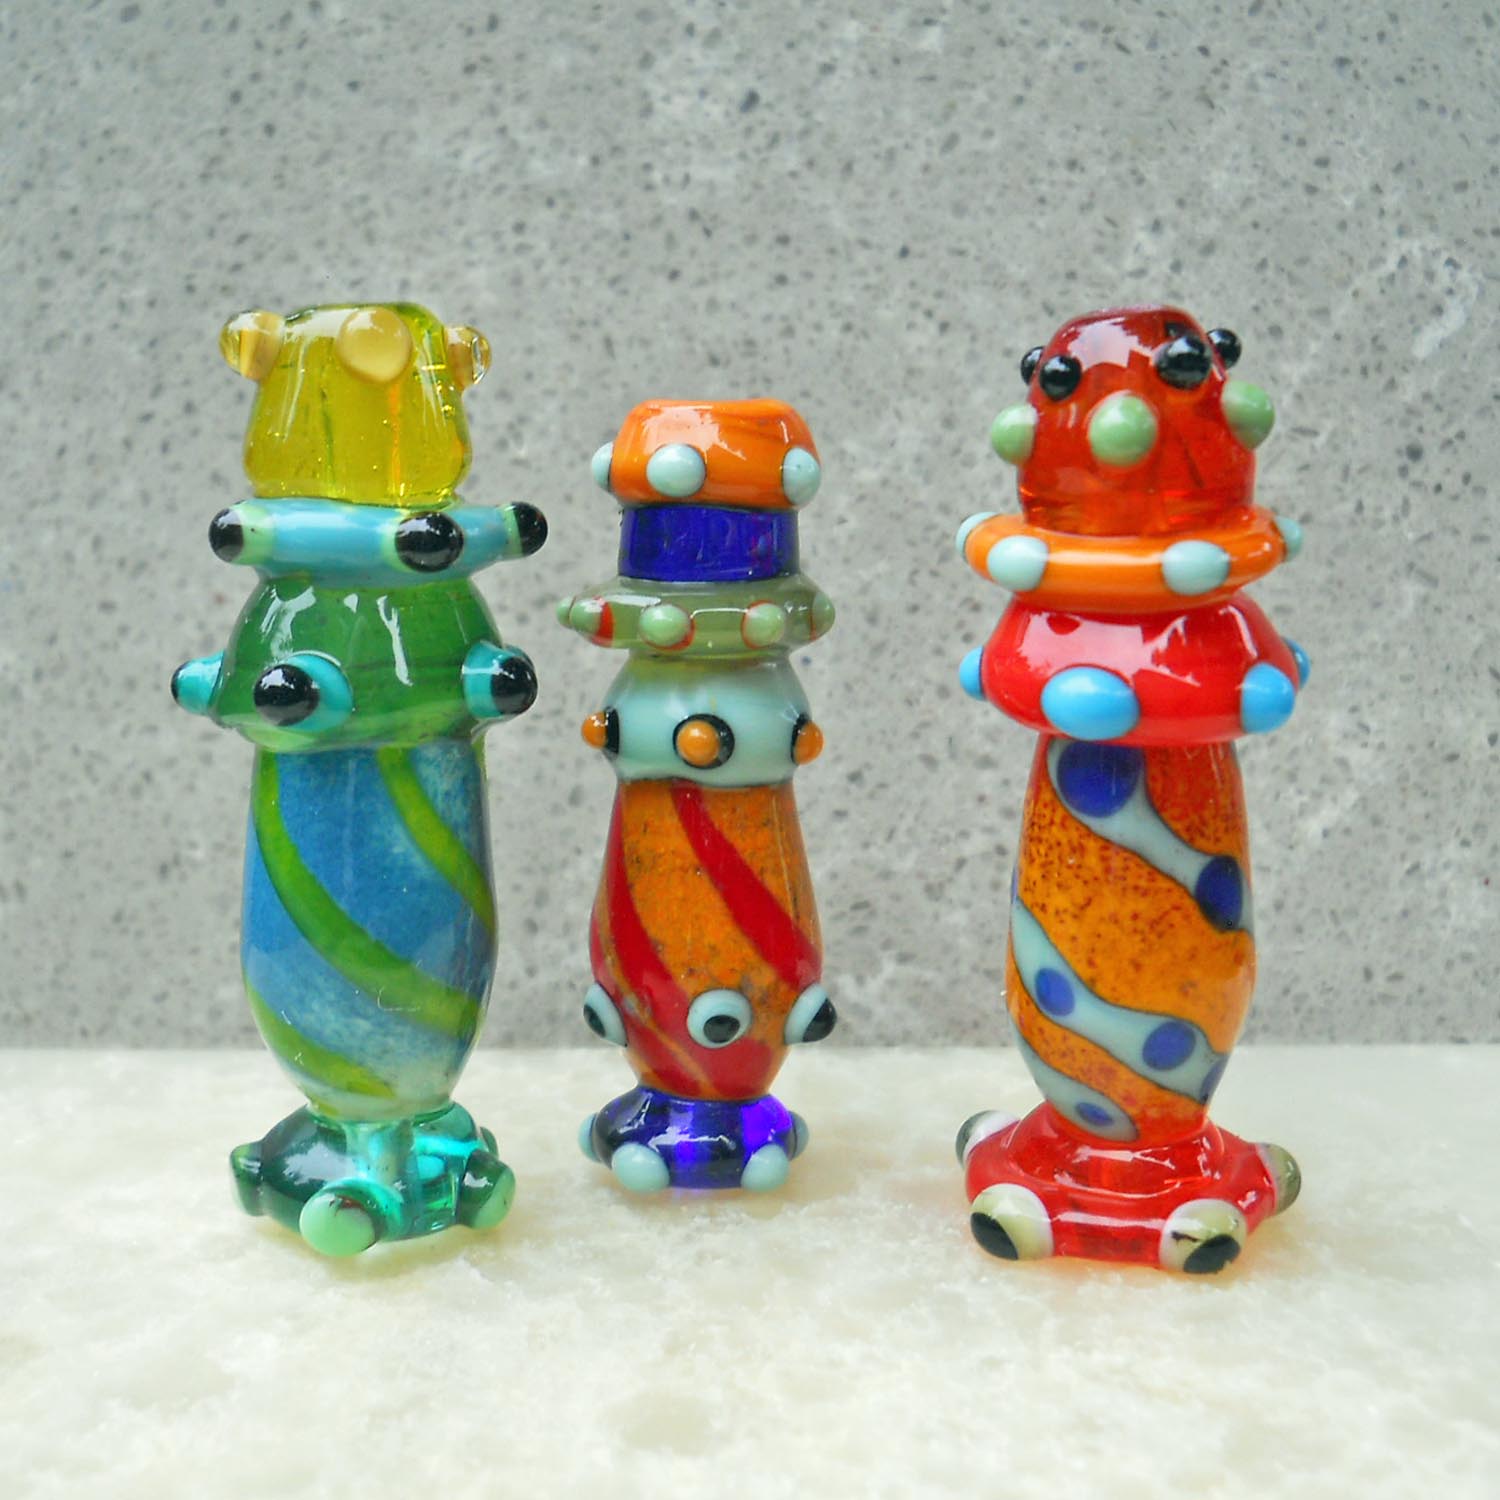 There is this cool book called 'Art Forms in Nature' published by Dover books that is simply filled with interesting designs to influence my glass work! any of those creatures are from the ocean realm. But sometimes I just have to pull them onto shore! Some these beads go distinctly into the fantasy realm, like these mannikin beads. I call them that because, well, they remind me of little sentries, or maybe chess men!
 People are so interested in learning to make hollow glass beads on the end of a hollow mandrel or small blow pipe- myself included! Thanks to a wonderful bead making buddy, I was shown a way to do it that is pretty cool, without the use of diamond shears. Many people can do this better than I can~ I am still learning, but this video will show the basics, along with ways to recover from some errors that I guarantee will happen to you too!
 This is not to be a blog on how to price your work. If you're looking for that, check out Laura Bracken's jewelry and craft pricing calculator.

 I am a 'bail as you go' bead seller. When I am at my table, I have a few pieces bailed and ready to roll and a lot that can be fixed up on demand. It is true that folks tend to buy the bailed pieces first (so I probably should have more of them ready to roll). I can sit at my table and do a few more throughout the day, which often brings folks by to see what I'm up to. I've also had folks who want to watch the bailing process- a mini class if you will. I'm just fine with giving out some pointers. If they're serious about it, they may learn a little something.


 But anyone can do that, right? Time to move on to something a bit more difficult. The next bead was made using a commercial thin stringer. Thinner than a regular commercial stringer, but still not really thin, so the lines still ended up thick-ish. I tried out a couple of parallel lines and then a couple intersecting lines. Here's where the sweet spot in the flame came into play. I have often heard that you can work to the side of the flame, using the heat of the bead to heat the stringer. Seems I was working more in front of the flame. I don't think it really matters, as long as the bead is hot enough to make the stringer stick. The stringer should be applied by pushing it onto the bead, not just laying it down onto the bead, or it will not adhere properly. If that happens, it will pull off of the bead and ball up, giving you dots instead of lines. In this case, I added some dots at the intersections of the lines to help hide any blobby bits there.
 Now on to the harder stuff! For this bead, the first step was pulling some thin stringer. I have not gotten to the hair-thin phase, but it's pretty thin! I decided to try some colors other than black just for fun. The main tip here is- PAY ATTENTION! Hold the stringer near the end so it doesn't wobble while you apply it, but be sure there is enough sticking out to make the entire swipe onto the bead at once. Be sure the tip of your stinger is not blobbly (cut it off if it is), heat the bead, put it in position out of the flame, but still close (your sweet spot) and apply the stringer by pushing it onto the bead. Wow, do I have shaky hands! You can see I used a lot of dots here and there to hide ends and wobbly bits. I had to figure out how to make that a design element! Oh, but now I've given it away... I do like the look of the different stringer colors~ helps with the retro look! And you can see that is is very different on each side. Why the heck not?!
 Just a short little bit of something- how about naming all those lampwork glass beads I make? Well, I don't normally name individual beads unless something just hits me. I figure the person who wants to wear the wee talisman will want to name it her (or sometimes his) self. But I can name a series or style of bead so- here goes.
 'Glitterati' fish have a shiny center and shiny bits of green aventurine on the outside- for folks who just have to have a bit of bling !
 'Chrysalis' beads are stylized beads based on cocoons or chrysalides. Folks seem to like the rebirth and moving to a new phase in life implications in these. They are interesting to make~ often I feel hard to get quite 'right.' I don't make them very often these days.
 Diane at the Soda Lime Times recently asked if I would like to do a tutorial on making these heart pendants to be published in the February issue of her popular digital magazine. She'd seen the Christmas ornaments I was making and thought they'd make nice pendants. Of course I was honored to be asked and gave an enthusiastic thumbs up.
.jpg) Whoot! My newest lampwork glass bead endeavor is making scarf slides. I finally got myself a really big mandrel- a whopping 1 inch- and started making beads for scarf sliders on them. Though a one inch hole may be a bit larger than needed for some scarves, they seem to be about right for rayon. I gave one to myself, one to my daughter and one to a friend as testers to see how they work out.
Whoot! My newest lampwork glass bead endeavor is making scarf slides. I finally got myself a really big mandrel- a whopping 1 inch- and started making beads for scarf sliders on them. Though a one inch hole may be a bit larger than needed for some scarves, they seem to be about right for rayon. I gave one to myself, one to my daughter and one to a friend as testers to see how they work out. .jpg)
.jpg)


.jpg)
 And, if anyone should have a yen to try this tut themselves, you can buy it right here- I think it's actually a pretty good bargain. Lots of information, and it even tells you how to make the seahorse with the steps two different ways around. I naturally go in a certain order, even though the other way makes a bit more sense! You can pick your favorite.

.jpg)
 Oh my, sometimes I just get into something, whether it makes sense or not! Right now it's what I call 'chrysalis' beads. I'm going to say that these are representational beads. They are not meant to be perfect reproductions of any type of chrysalis, but rather the idea of a chrysalis. I don't like to attribute any special meanings or powers to my work. I'll leave that up to you!.
.jpg) So here goes- what are these beads all about? Well, the first one was really an accident. I made this wild bead and decided it looked pretty cocoon-y. Months later I decided to try something like it again. And then there was a competition I wanted to enter that I decided would be perfect for a chrysalis of some kind.
So here goes- what are these beads all about? Well, the first one was really an accident. I made this wild bead and decided it looked pretty cocoon-y. Months later I decided to try something like it again. And then there was a competition I wanted to enter that I decided would be perfect for a chrysalis of some kind..jpg) I worked on a lot of different styles- some of them actually pretty accurate, and finally settled on the style of the red one on the left as being what I wanted. Of course I was not chosen, but I had a lot of fun working on these.
I worked on a lot of different styles- some of them actually pretty accurate, and finally settled on the style of the red one on the left as being what I wanted. Of course I was not chosen, but I had a lot of fun working on these. I know not everyone will 'get' these, but I have been really happy with feedback I've gotten from folks. When people purchase them for family members who are going through a period of renewal, I am truly honored. So here is a pile of my most recent chrysalis beads...
.jpg)
.jpg) I've been working on beads sets a little at a time lately. Trying to make more supplies available in my etsy shop. I've kind of decided on the name 'stone soup' for the types of sets I'm making right now. They look like they've got bits and pieces of stone all through them- very organic.
I've been working on beads sets a little at a time lately. Trying to make more supplies available in my etsy shop. I've kind of decided on the name 'stone soup' for the types of sets I'm making right now. They look like they've got bits and pieces of stone all through them- very organic.

